Well hello there folks! Sorry I’ve completely neglected you all of late… We in the Dahlin household have had a very busy schedule in addition to the various life changes we have had recently as well as some major life changes of late.  I just wanted to take some time to update you guys on what’s been going on before we jump back into the swing of things :).  I’m going way back to my last post in February (I know, I can’t believe it’s been that long!) and will work forward from there. 

In the middle of February, we went on a Cruise with our best friends Ben and Amanda.  We went to Cozumel, Belize, Isla Roatan, and Grand Cayman.  We had an amazing time and it was a great break from the miserable winter we had in Minnesnowta.20140608-235449-86089093.jpg

Now on to the first week in March…we added a new member to our little family!  Meet Riley, out BIG German Shepherd puppy.  20140608-223818-81498783.jpgWhen we got him at 12 weeks old (left picture) he weighed a whopping 31 lbs and has since (right picture) doubled in size! Even though he is a complete giant, I am hopelessly and irrevocably in LOVE with this oaf, so expect to see lots more pictures of him (and of course my baby girl, Princess.)

Thirdly, I got a new job! As hard of a decision as it was for me to leave my residents whom I loved, as well as coworkers I had grown close to, I had an opportunity that I could not refuse come my way.  I will still be working as a music therapist in nursing home, however my new facility is closer to home and allows me to work only 4 days a week.  So am I too lazy to work 5 days a week? NO! The really unique part of this opportunity is that since I have a free day in my schedule now (in addition to not having to work Satuday’s anymore) allowed me to join a private practice as a sub contractor for two of my best friends Lyndie and Andrea over at Toneworks LLC.  I am so excited to embark on this new journey and grow as a music therapist. 

This summer is totally crazy for Eric and I (8 weddings in addition to other obligations).  We kicked off wedding season in May with my dear friend and sister Shannon’s wedding. It was an absolutely stunning wedding and was great to get together with my sisters again.20140608-235753-86273133.jpg

The following weekend I got to celebrate another sisters soon-to-be nuptials with her bridal shower and bachelorette party.  It was a BLAST celebrating Erika and gave me a chance to do some crafting for them [stay tuned for some posts featuring the gifts I made her].

I then got to spend memorial day weekend getting my house back in order as well as celebrating my bestie, Lo’s, birthday.20140608-235819-86299185.jpg

Then, Eric and I set off to Richmond, Virginia to celebrate one of Eric’s best friends from high school, Alex’s wedding to Liz over at I Heart Vegetables.  This was the first time I had the pleasure of meeting Liz, and she is by far the SWEETEST person I have ever met in my life.  It was a wonderful weekend with old high school friends and witnessing two people who could not be more perfect for each other start their lives together.  20140608-235929-86369465.jpg20140608-235930-86370497.jpg

Well, that brings us to this past weekend where I flew out to Indianapolis to visit my mom and grandparents who were visiting her from Canada.  On Friday, I visited Columbus [the town I grew up in] and went to Zaharakos, an old fashioned, family owned ice cream parlor that I grew up going to followed by a party my mom hosted at her gorgeous new home. Saturday, we slept in, shopped all day, and got drinks in Broad Ripple with her new best friends there. Today was pretty relaxed, we went to little pet friendly, French bistro & champagne bar, did a little shopping, and spent some time together as a family. 

That brings me up to where I currently sit, at 11:45 pm, on the floor at the Chicago O’Hare airport because my flight back to Mineapolis is delayed [obviously].  

Now that I have filled you all in on what’s been occupying my time the last 3 ½ months, I hope you guys can forgive me, or at least understand all that’s been going on.  It was a really big change switching jobs and becoming a new [puppy] mommy on top of all of our adventures. While I wasn’t cooking or crafting as much as I’d like, I did document any new things I tried so I have some stuff in store so I can get back into the swing of things. 


Welp, they are finally starting to board my flight, so I’m going to have to sign off, but first up on the chopping block is a delicious Berry Cobbler! Stay tuned and see you soon!


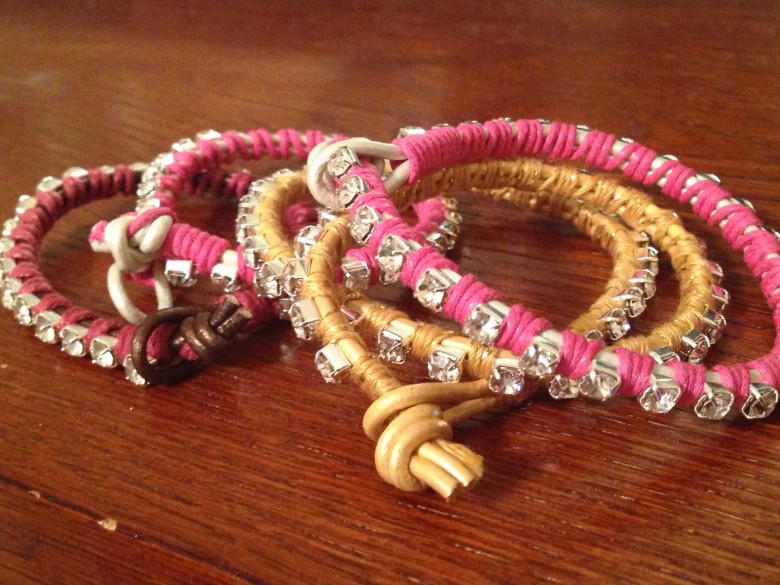
20140213-133318.jpgHey folks! Long time no see…So much has been going on!  Work has been absolute crazy town, I had Bronchitis for 2 weeks, and have been getting ready to leave for vacation (3 more days!!) I have all kinds of fun crafts coming up here for you guys but I figured I’d start us out with these adorable, super easy to make, wrap bracelets. Now, for those of you who don’t know me too well, I’m a TOTAL wrist candy girl.  Wrap bracelets, bangles, watches…anything you can put on your wrist, I’m all about. Now, wrap bracelets have been making multiple appearances on Pinterest lately, so I decided to jump on the bandwagon and do a tutorial on how to make this style of them.  There are TONS of tutorials out there on how to make these, but I found Honestly WTF‘s to be the easiest to follow and adapt.  Her tutorial is designed for a double wrap style and mine will be for a single wrap, but that’s the beauty of these, you can play around with materials so it’s exactly what you want!  Since these  bracelets are SO quick and easy to make (i finished this one in under 5 minutes) they make great gifts…especially if you’re in a time crunch! I got all of my materials at JoAnne’s in the bead section.
 

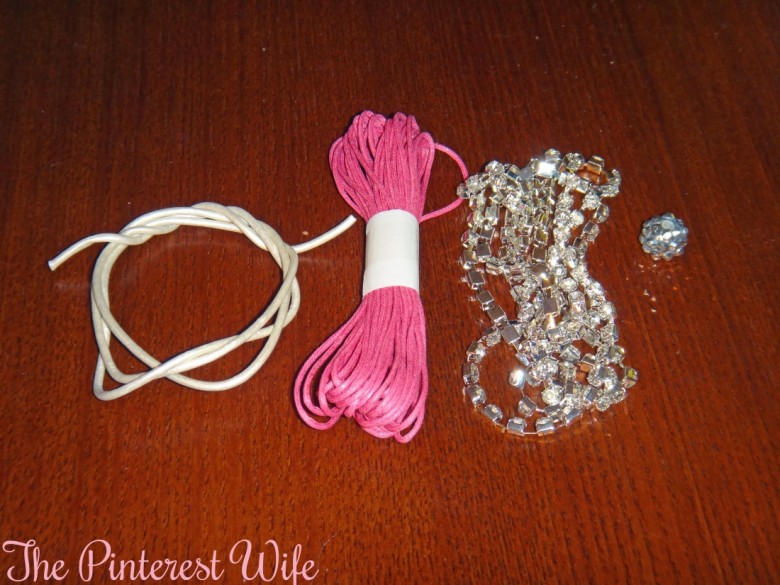
Materials

  • 22″-27″ Leather Cord (Mine was 1.5mm, but you could try a different size if you wanted)
  • 6″-8″ Crystal chain or ball chain
  • 29″-36″ Waxed linen cord
  • Scissors
  • Larger bead or hex nut  (optional)

DSC00695


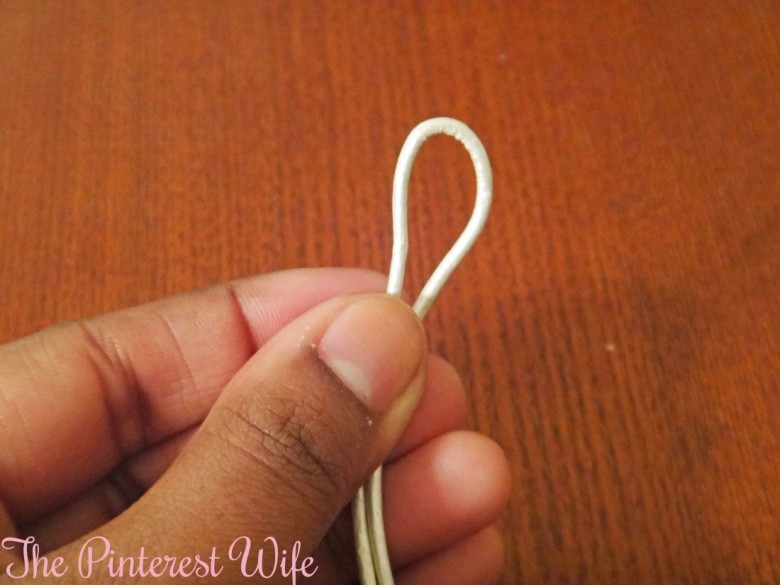
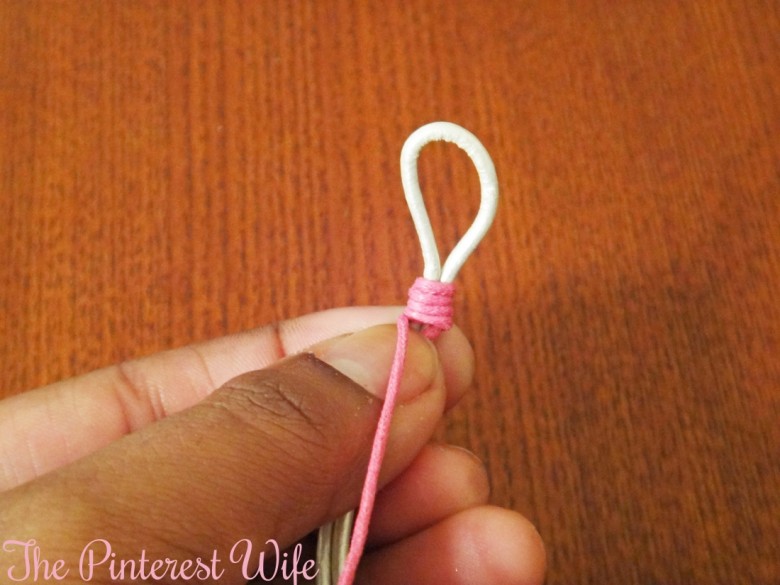
  1. Fold your leather cord in half to form a loop (Make sure your loop is big enough to fit around whatever you’re using to secure the bracelet but small enough that it doesn’t just slip off)DSC00697
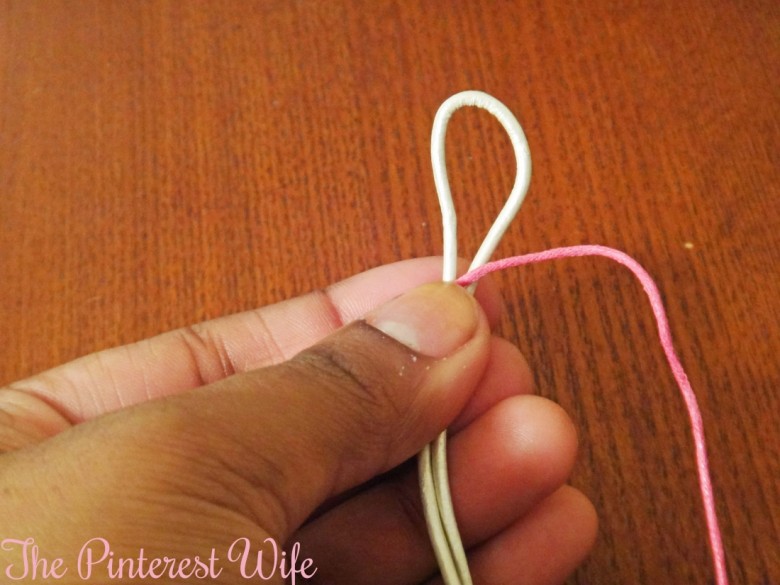
  2. Place the tip of your linen cord slightly below where you want the loop to end and going towards the loopDSC00698
  3. Begin wrapping the cord at the point the loop should end and continue wrapping away from the loop 5-6 times (this secures the end of the linen cord to the bracelet)DSC00700
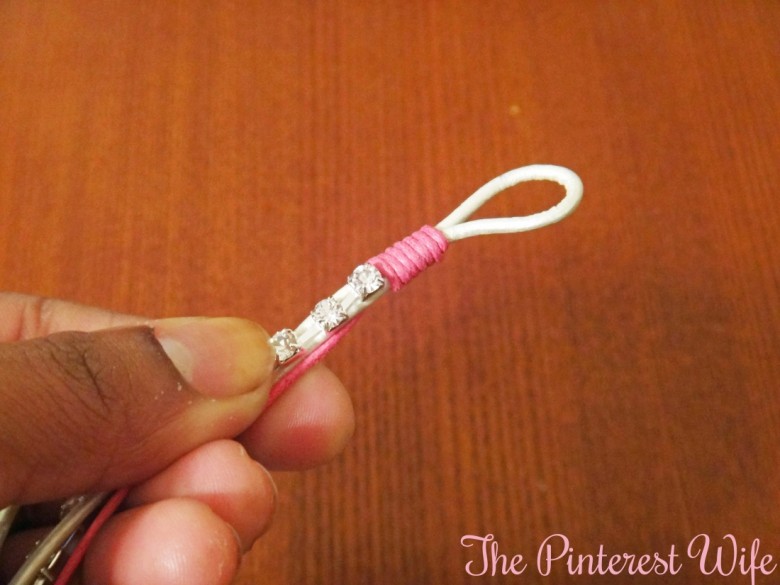
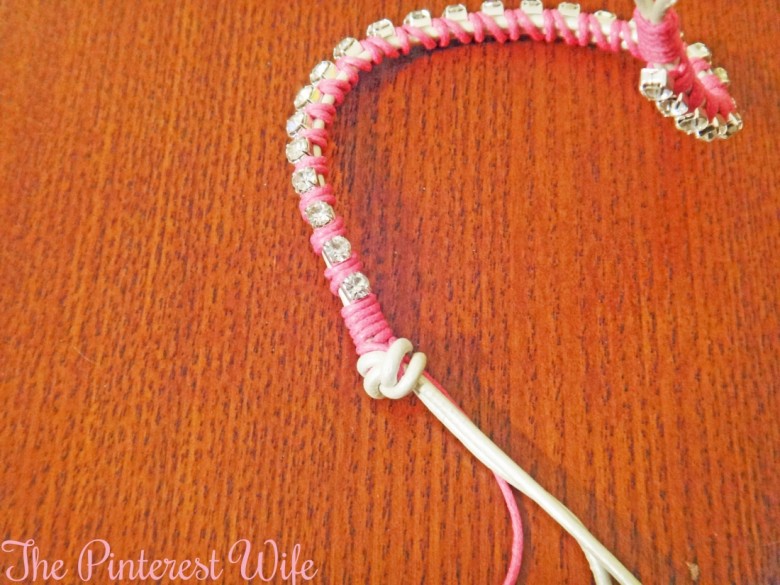
  4. Place the end of your chain on top of the leather cord where you just finished wrappingDSC00701
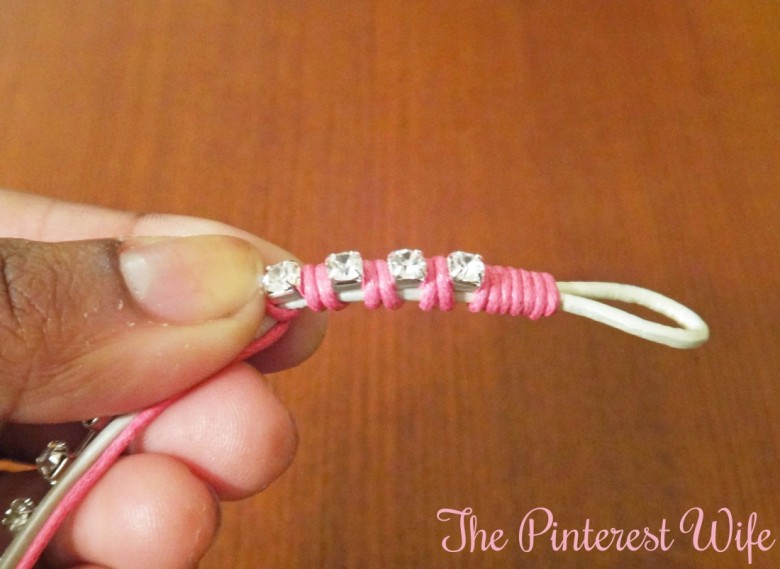
  5. Wrap the linen cord around each stone/ball in the chain (depending on the space between the chain, you may want to wrap more than one time to ensure it is tight)DSC00703
  6. Continue wrapping around each stone and check the fit around your wrist. 
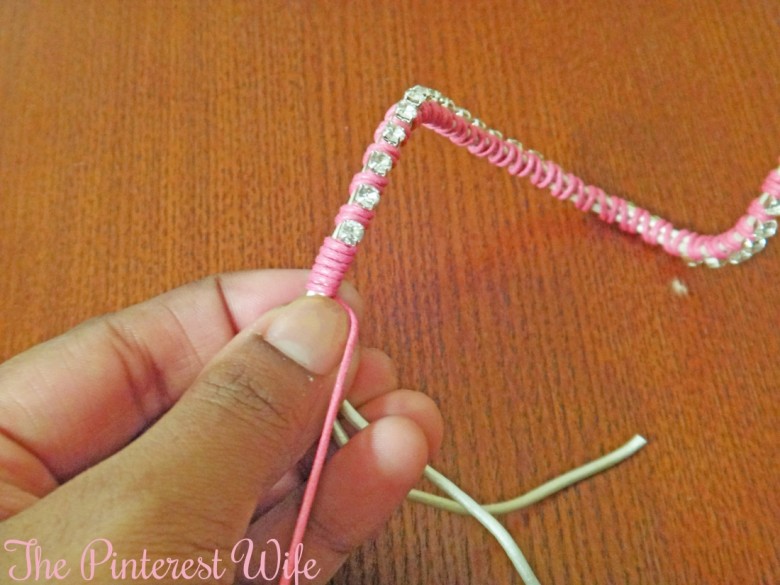
  7. When the fit is snug around your wrist (or you run out of chain) wrap the wax cord around the leather 5-6 more timesDSC00704
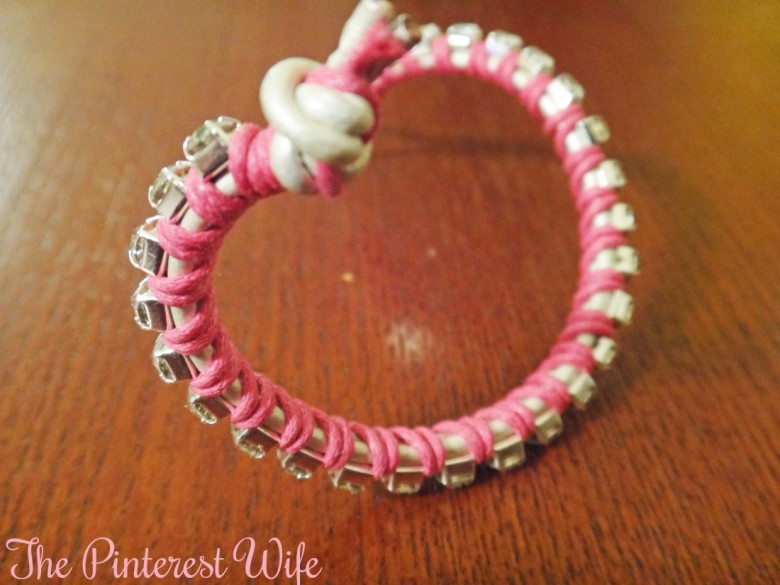
  8. Tie a knot with all three strandsDSC00708
  9. OPTIONAL: Thread a bead or hex nut through the leather + linen and tie another knot on the end to secure it!
  10. Cut off excess leather and linen
    [OPTIONAL: If you’re worried about the knot coming undone with taking it on and off a lot, put a DAB of E-6000 or super glue along the edge of knot to hold it in place]DSC00711


Voila! Easy peasy right?! You can also experiment with double and triple wrap bracelets, just double or triple the materials and make sure you are checking for fit as you go!  You can also try this with embroidery thread or experiment with different types of chain.  Interested in a different style of wrap bracelet? Fret not my friends, I will have tutorials for some other ones soon :)

Like I said, I leave for vacation on Sunday and will be gone for a week, but I am going to try my hardest to post more often after that, because I have TONS of pictures from all of the crafts and recipes I’ve been trying that are just waiting to go into tutorials.

Happy crafting, loves!

IMG_2825Happy Monday! We in the Dahlin household had the laziest of lazy Sunday’s yesterday.  We slept in until about 1 (didn’t actually get out of bed until 1:45), ran to the grocery store to get supplies for breakfast, ate breakfast (it may or may not have been 3:45 when we ate) took a 4 hour nap, woke up at 9:30 made grilled cheese and tomato soup, showered, and went back to bed.  Seriously…laziest Sunday ever.  So, the mister is a huge French Toast lover, but I get board of making things the same way all the time (me? get bored? NEVER!)  Anywho, I was perusing Pinterest a few weeks ago and stumbled upon this recipe for French Toast Roll Ups and could not WAIT to try them.  The prep was a little longer than what regular french toast requires, but well worth it.  You’ll notice only 4 roll ups in all of the pictures even though the recipe called for 8 slices of bread.  No, I did not have a little muchkin stealing these nor did I forget how to count, but the hubbs was a little apprehensive so I used the other 4 pieces to make regular french toast just in case he didn’t like the roll ups (which he did, indeed, like.) Also, I did adapt the egg mixture from the recipe and used the measurements and ingredients that I have always used, as well as lightening up the recipe as much as possible.

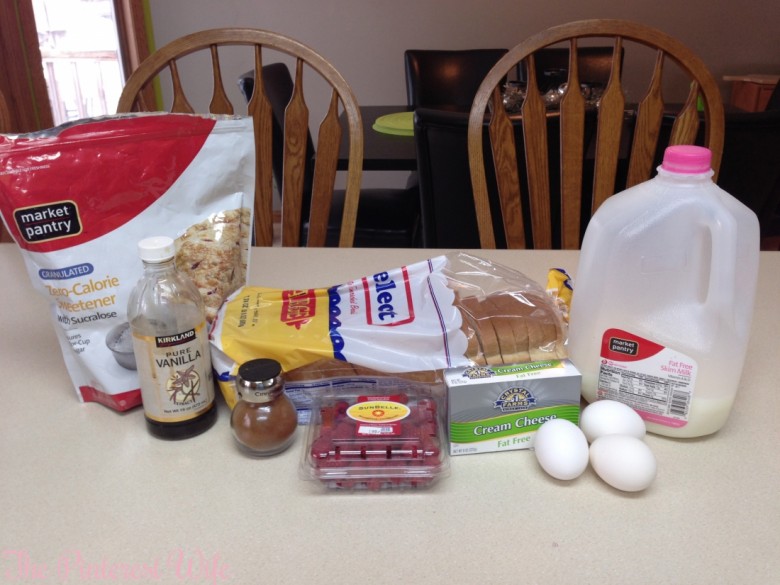
Ingredients

  • 8 slices of white bread
  • 3 large eggs
  • 1/4 C Skim Milk
  • 1 Tbsp. Vanilla
  • Fat free cream cheese or Nutella
  • Diced Raspberries (you could also use strawberries, blueberries, bananas, or any fruit of your choice)
  • 1/4 C Splenda (regular sugar would work too)
  • 1 heaping tsp. Cinnamon
  • 1 Tbsp. lite margarine IMG_2804
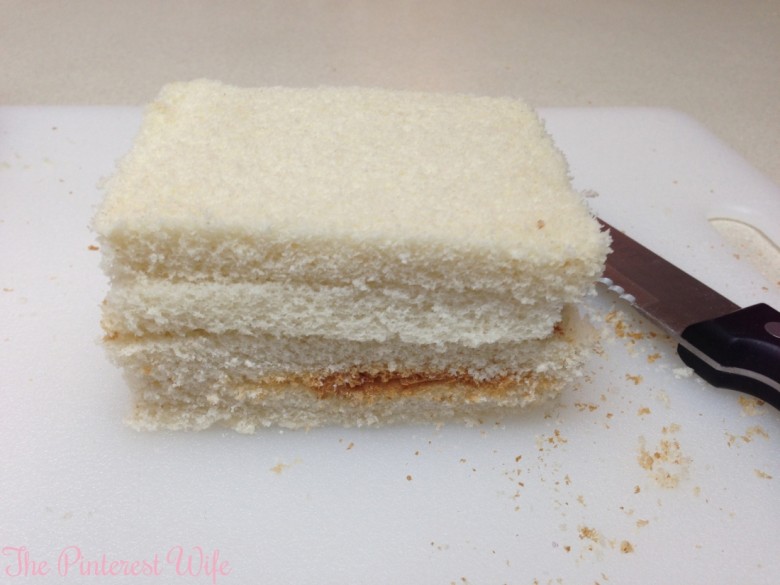
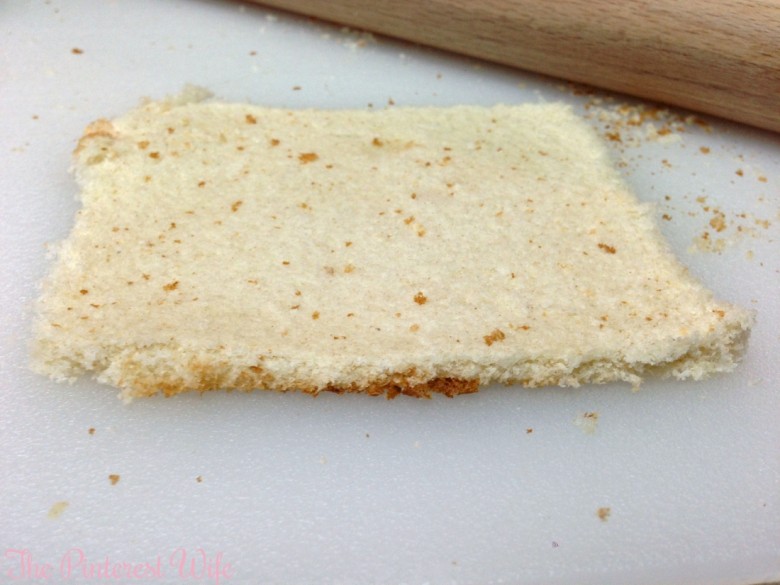
  1. Cut the crust off of the breadIMG_2809
  2. Flatten each slice using a rolling pinIMG_2810
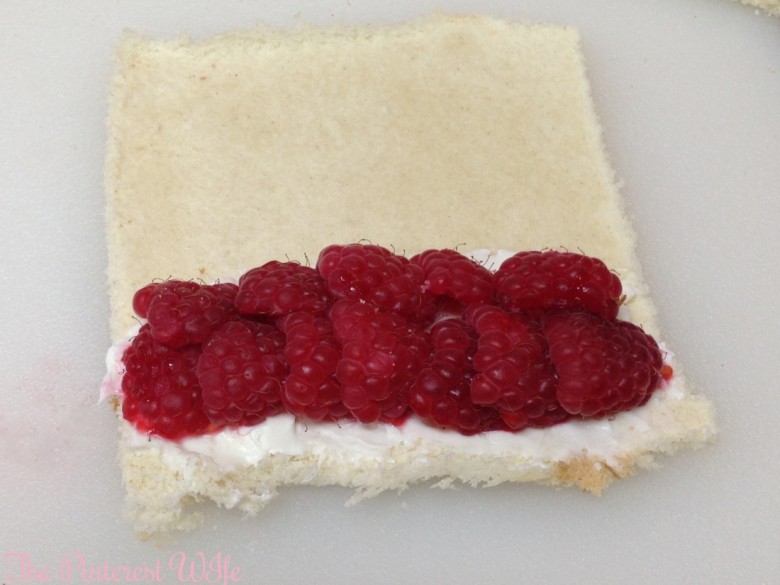
  3. Spread cream cheese or nutella on 1″ of the top of the bread
  4. Place your fruit of choice in a line on top of the spreadIMG_2811
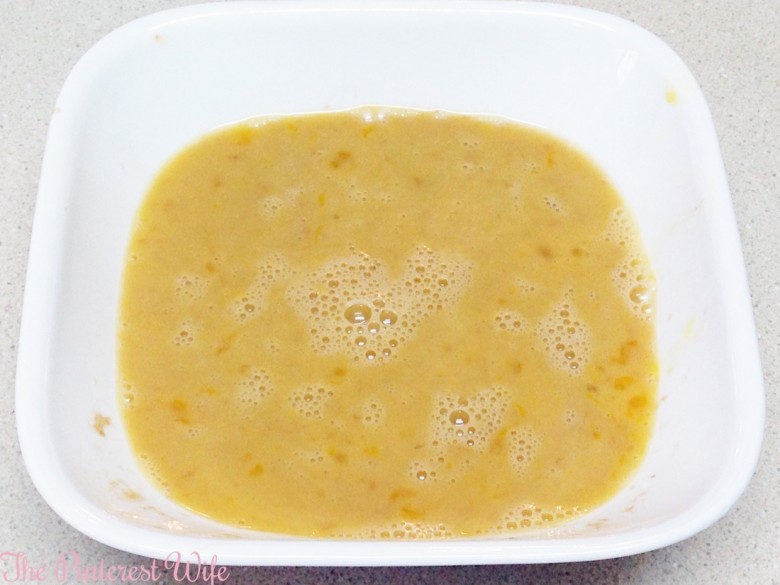
  5. In a shallow bowl, wisk eggs, milk, and vanilla together until combined wellIMG_2808
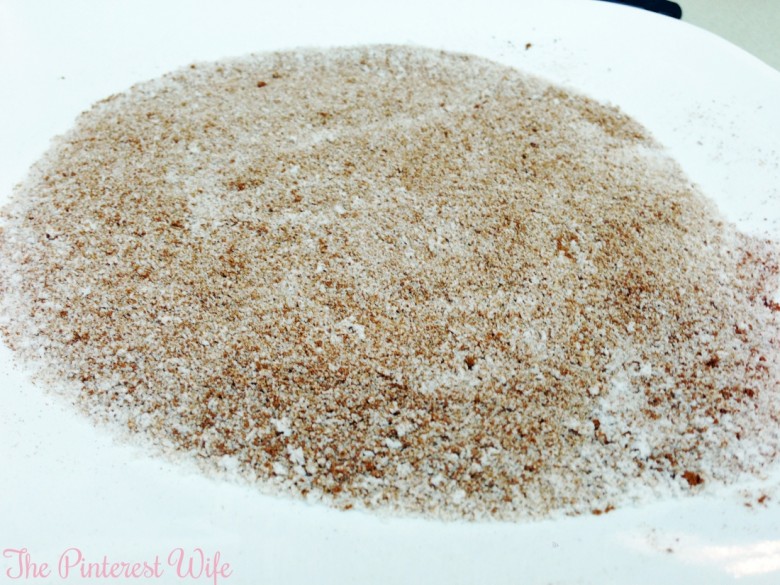
  6. In a small plate or another shallow bowl, mix together cinnamon and splendaIMG_2818
  7. Heat skillet over medium heat and melt margarine in pan
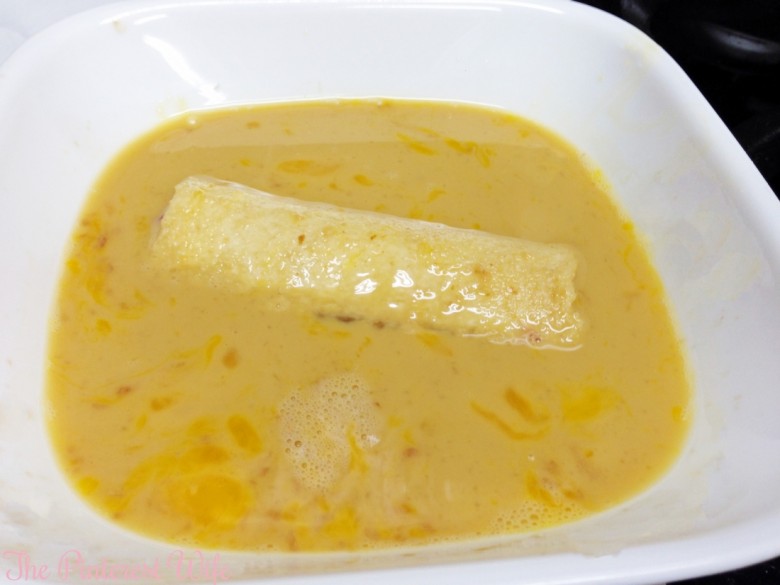
  8. Dip each bread roll in the egg mixture IMG_2814
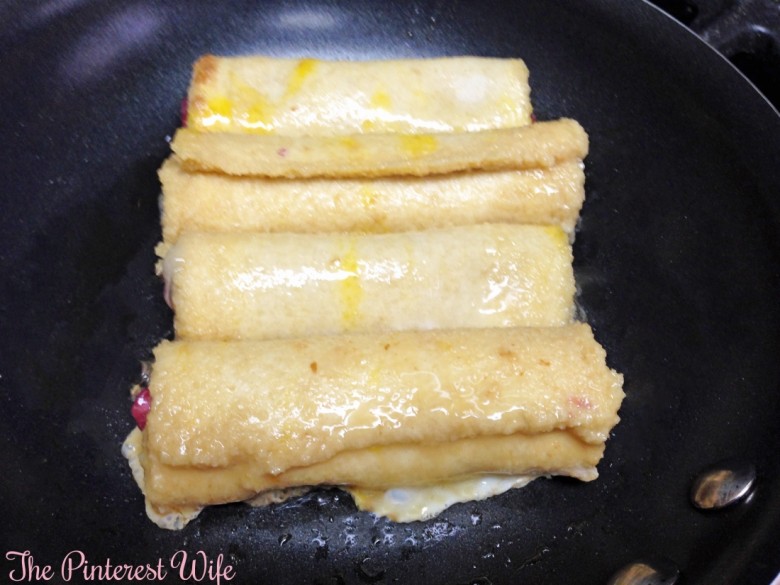
  9. Place in the pan, turning until all sides are golden brown (~2 minutes per side)IMG_2817
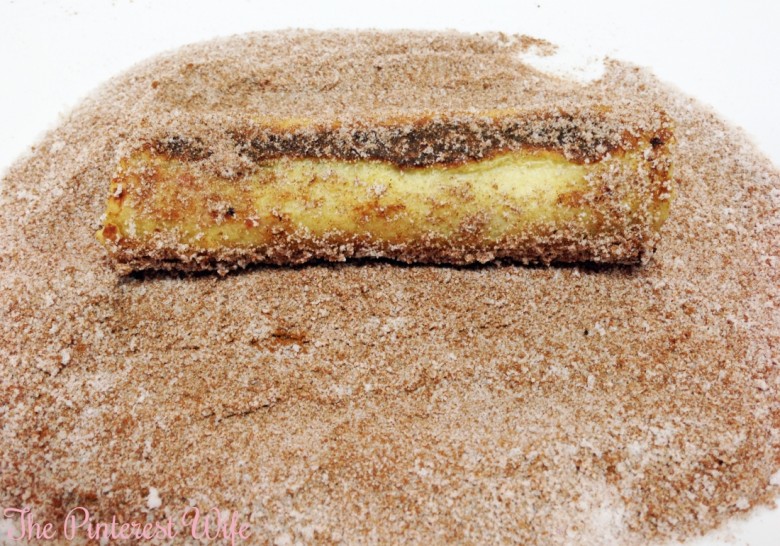
  10. Immediately after cooking, roll each piece in cinnamon sugar mixture until all sides are coated in the mixtureIMG_2819
  11. Serve alone or with Lite syrup for dipping

Just the original recipe tells you to put the rolls in the pan seam side down however I tried 2 seam down and 2 with the seam up and didn’t find a huge difference in how it held together, however, if you are concerned about the fruit falling out or something, place the seam down.

French Toast Roll Ups
Serves 2
A delicious variation on a classic breakfast favorite
Write a review
Print
Prep Time
10 min
Cook Time
5 min
Total Time
15 min
Prep Time
10 min
Cook Time
5 min
Total Time
15 min
Ingredients
  1. 8 slices of white bread
  2. 3 large eggs
  3. 1/4 C Skim Milk
  4. 1 Tbsp. Vanilla
  5. Fat free cream cheese or Nutella
  6. Diced Raspberries (you could also use strawberries, blueberries, bananas, or any fruit of your choice)
  7. 1/4 C Splenda (regular sugar would work too)
  8. 1 heaping tsp. Cinnamon
  9. 1 Tbsp. lite margarine
Instructions
  1. Cut the crust off of the bread
  2. Flatten each slice using a rolling pin
  3. Spread cream cheese or nutella on 1" of the top of the bread
  4. Place your fruit of choice in a line on top of the spread
  5. In a shallow bowl, wisk eggs, milk, and vanilla together until combined well
  6. In a small plate or another shallow bowl, mix together cinnamon and splenda
  7. Heat skillet over medium heat and melt margarine in pan
  8. Dip each bread roll in the egg mixture
  9. Place in the pan, turning until all sides are golden brown
  10. (~2 minutes per side)
  11. Immediately after cooking, roll each piece in cinnamon sugar mixture until all sides are coated in the mixture
  12. Serve alone or with Lite syrup for dipping
Notes
  1. The egg mixture should really help to seal the rolls closed, but if you are still concerned about ingredients falling out when you cook it, place them seam side down.
Adapted from The Girl Who Ate Everything
The Pinterest Wife https://www.thepinterestwife.com/

DSC00643Happy New Year guys! Wowzers, it’s been a long time since I’ve posted…I’m so SO sorry!  Any who, it’s a new year and lets admit it…we all make plans to eat healthier, get skinnier, workout more, blahhh blahhh blahhh.  As you guys know, I like to find ways to make my favorite, [[unhealthy]] foods healthier. So I’m giving you all one of the EASIEST deserts that tastes amazing and won’t make you want give up on getting healthy this year! These “fried” honey bananas will without a doubt have you wondering why you every thought you should deprive yourself of desert…or why you thought you should 😉

Ingredients

  • 1 banana (a little under ripe is best)
  • 2 tsp. Olive oil
  • 1 Tbsp. Honey
  • 1 Tbsp. Water
  • 1/2 tsp. Cinnamon (or however much you want to sprinkle on)
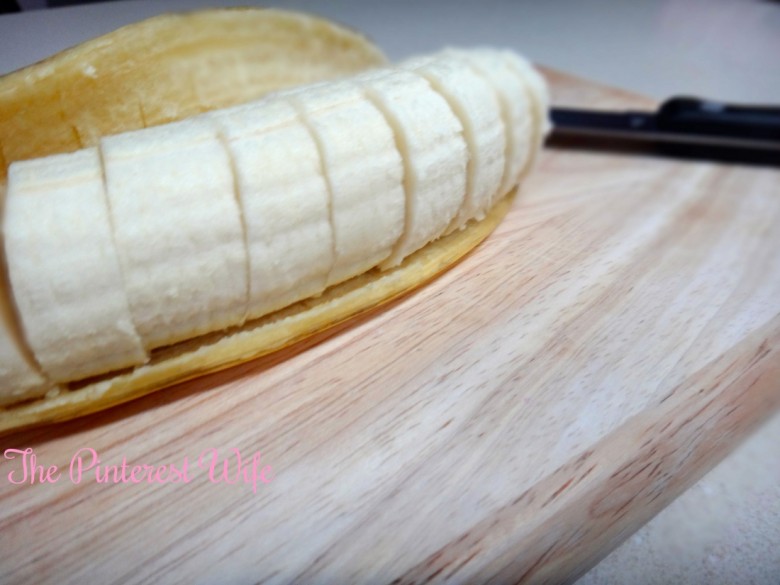
  1. Slice your banana into 1cm-2cm piecesDSC00633
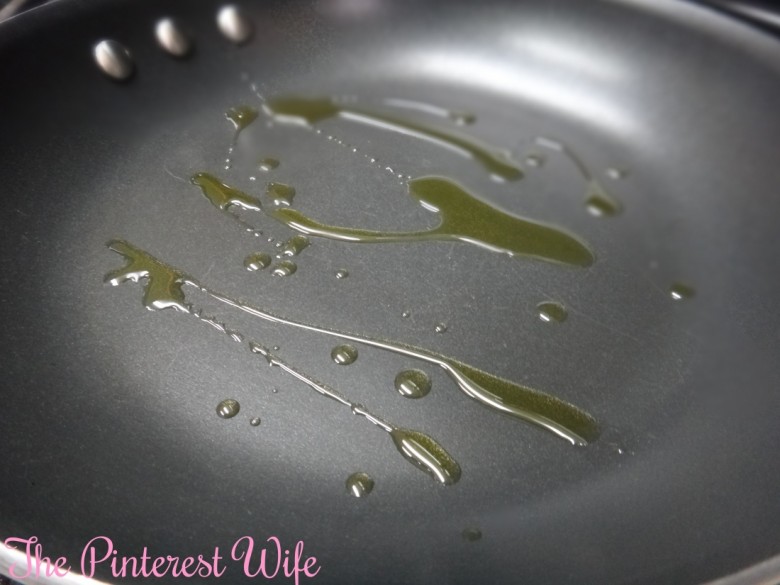
  2. Drizzle olive oil into a panDSC00634
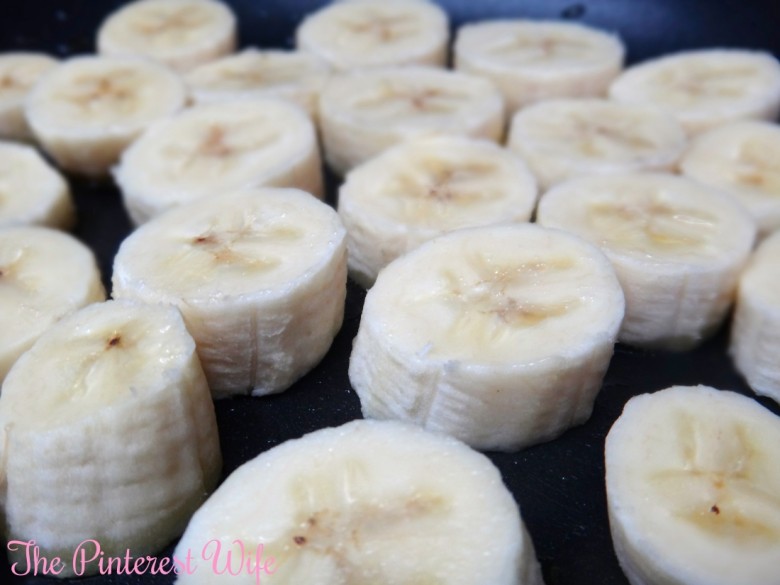
  3. Arrange bananas in the pan and cook for about 1-2 minutes per sideDSC00635
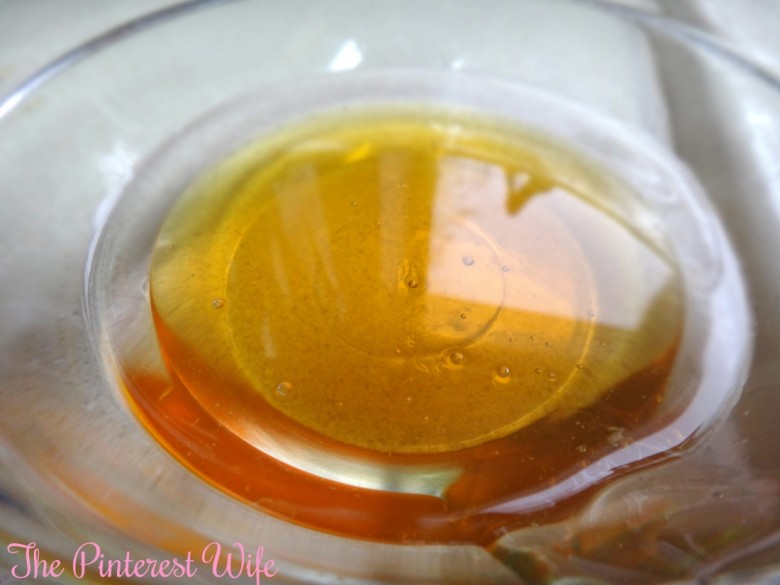
  4. While the bananas cook, mix together honey and waterDSC00636
  5. Remove the pan from heat and pour honey + water mixture over your bananasDSC00642
  6. Let them cool for a minute or so and sprinkle with cinnamon
Skinny Honey Bananas
Serves 1
Quick, easy, healthy desert
Write a review
Print
Prep Time
1 min
Cook Time
4 min
Total Time
5 min
Prep Time
1 min
Cook Time
4 min
Total Time
5 min
Ingredients
  1. 1 Under ripe banana
  2. 2 tsp. Olive Oil
  3. 1 Tbsp. Honey
  4. 1 Tbsp. Water
  5. 1 tsp. Cinnamon
Instructions
  1. Slice banana in 1cm- 2 cm pieces
  2. Drizzle Olive Oil into pan
  3. Arrange banana slices in pan and cook for 1-2 min per side
  4. Mix water and honey together while bananas are cooking
  5. Remove bananas from heat and pour honey + water mixture over it
  6. Allow to cool for 1 minute and sprinkle with cinnamon
Adapted from Rachel Schultz
The Pinterest Wife https://www.thepinterestwife.com/

DSC00558Hi guys! I am probably the happiest camper in the world right now… 1. I just got back from the American Music Therapy Association National Conference in Florida, and it was beyond AMAZING.  I attended some really great sessions, had the opportunity to chat with my professional idols, and obviously was enjoying the warm, Florida sun. 2. This upcoming week is probably my favorite week of the year.  Thanksgiving (my favorite holiday) is on Thursday, national shopping day is on Friday AND Eric and I are hosting our 3rd annual Friendsgiving [actually my favorite thing in the world].  3. I’m doing my first crafting post today!! Since it’s my favorite week, I will be giving you guys a new Thanksgiving post every day this week, and to get us in the mood for turkey day, how about sharing one thing we’re thankful for each day?! (yes, I know it’s cheesy, and I’m 100% ok with that.)

Anyways, now that I went on a mega tangent… the first turkey day inspired pin I did was this adorable tulle wreath.  It was very easy to make, but can be a little time consuming to tie the tulle and wrap the yarn around it, but looks so dang cute that it’s worth it.

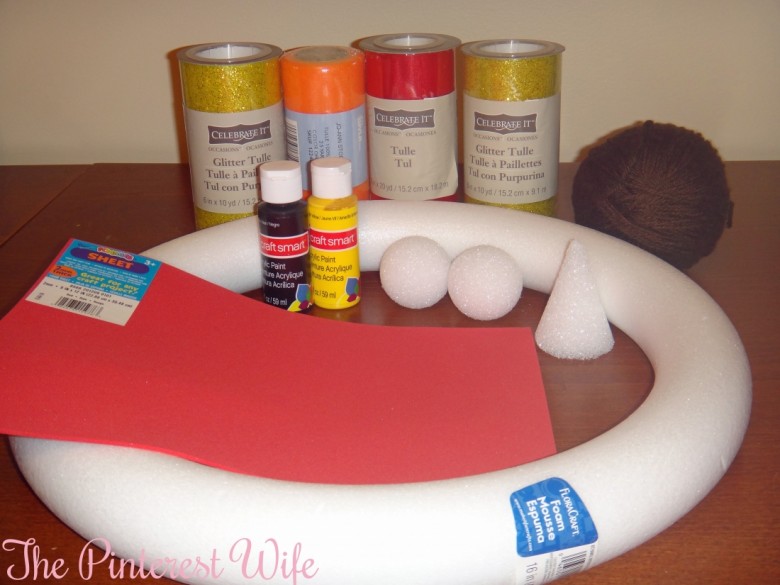
Materials:

  • Foam wreath (I used a 16″ one)
  • 55 Yards of Tulle in Red , Orange, and Yellow (you can choose how you want it divided up on your wreath),
  • 2  1″ Styrofoam balls (could use bigger/smaller ones depending on the size of your wreath)
  • Styrofoam cone
  • Brown Yarn
  • Black & Yellow Paint
  • Paint Brush
  • Red foam sheet
  • 3 toothpicks
  • Hot glue gun (not pictured)

DSC00510

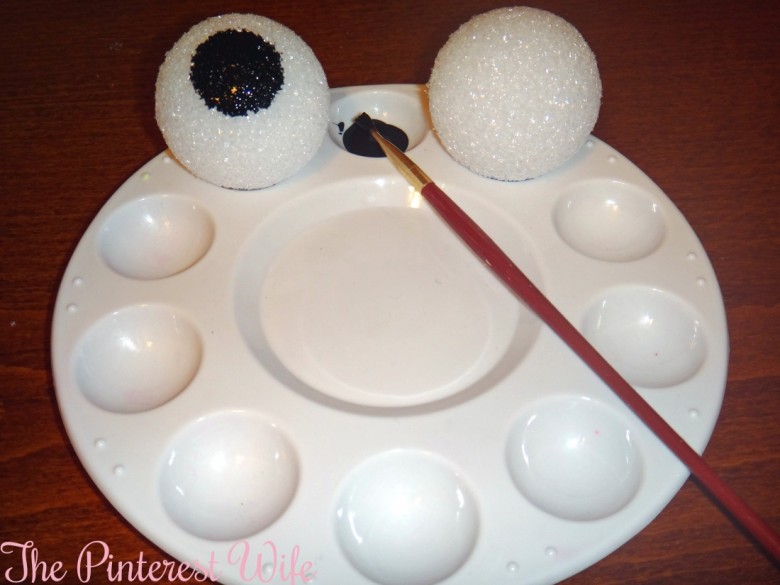
  1. Paint eyes on your Styrofoam balls & set aside to dryDSC00512
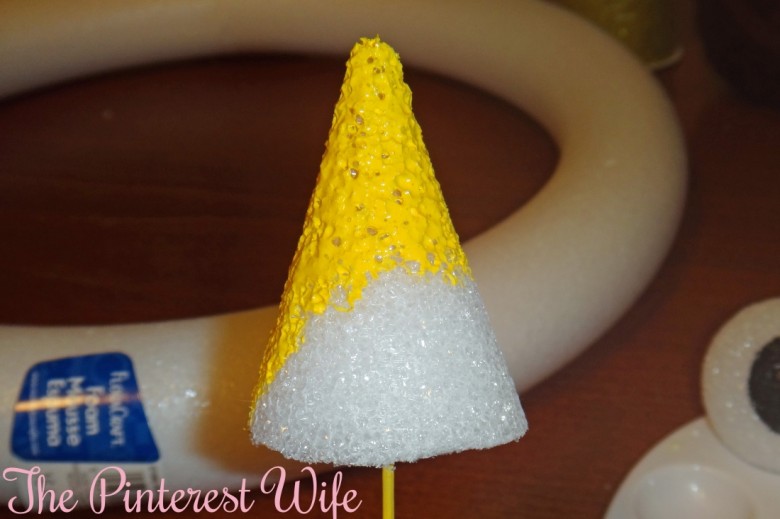
  2. Paint the entire cone yellow & set aside to dryDSC00513
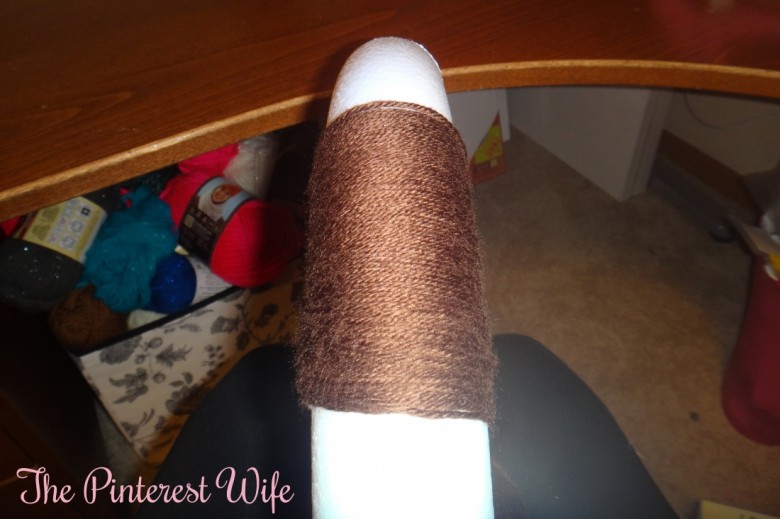
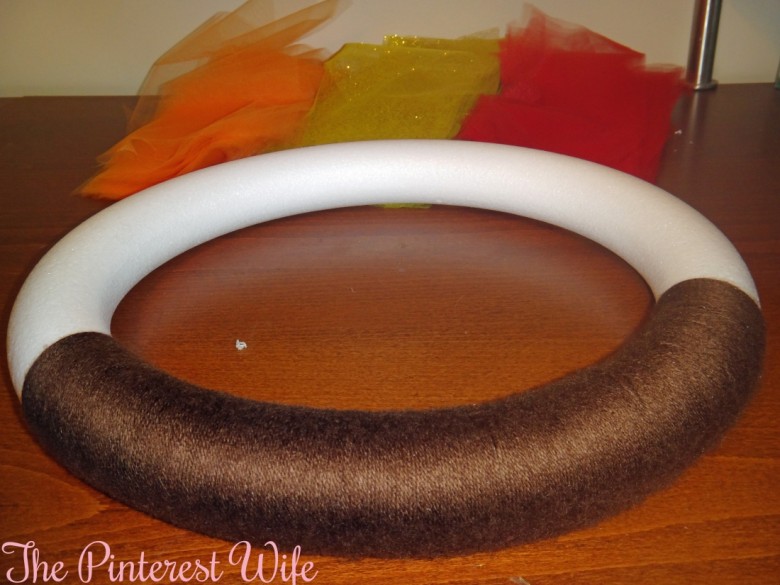
  3. Wrap about 1/3 of your wreath with brown yarn. (I put a dab of hot glue at the beginning so the yarn wouldn’t budge) *This part is INCREDIBLY tedious. You can be an uber perfectionist like me and make sure there are no bumps whatsoever when you wrap it or you can just wrap and be ok with it having a few bumps from yarn being wrapped on top of itself*DSC00515
  4. Once you’re satisfied with the size of the body, cut the yarn and put another dab of hot glue where you ended.DSC00519
  5. Wrap all of your tulle around a cereal box (I just wrapped one roll on top of the other for it to go quicker, but you could just as easily do each roll individually)
  6. Cut straight across the top and bottom of the box so you’re tulle is cut into stripsDSC00518
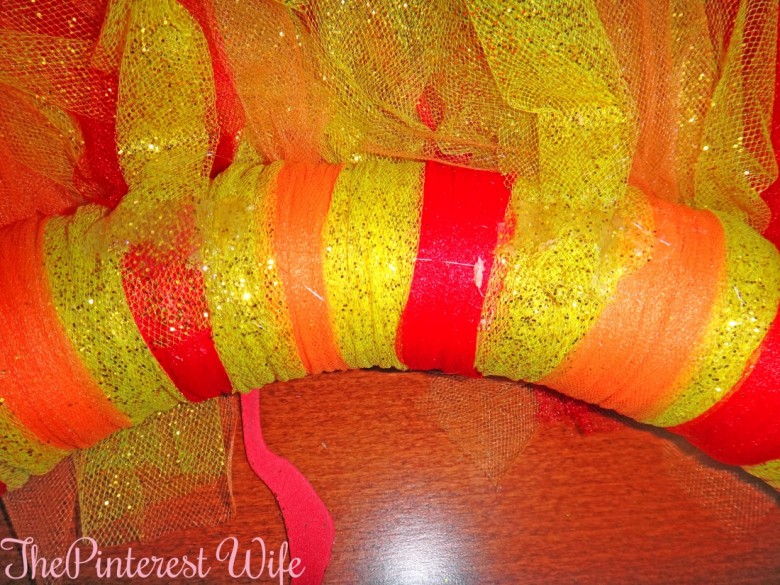
  7. The feathers are created by tying the tulle allllllllllll around the rest of the wreath.  (make sure you save a piece or two.) I would suggest taking a glass of wine and doing this while watching a movie, because while it is incredibly easy, it takes forever to do. You can do it haphazardly or have a pattern in mind (I did red, yellow, orange, yellow)
  8. Arrange all of your knots so they are facing the same direction DSC00535
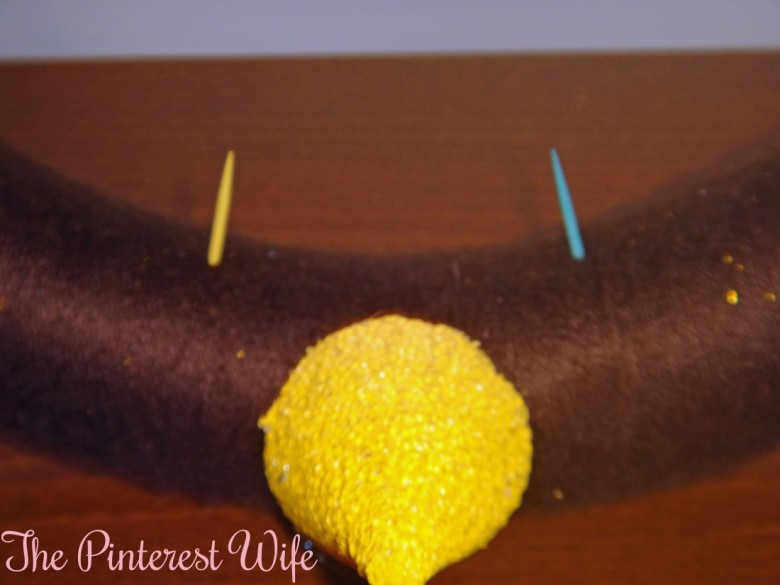
  9. Stick a toothpick in the middle of the brown section on the top side.
  10. Put a little hot glue around the base of the cone and center on the toothpick
  11. Push two toothpicks in on the inside part of the wreath about an inch on either side from the coneDSC00539
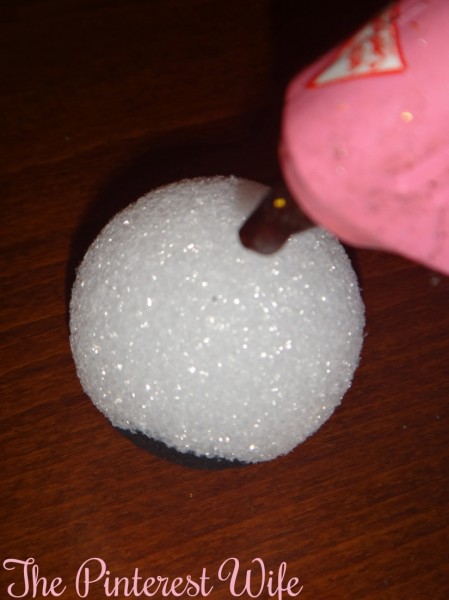
  12. Put a little hot glue on the eye ball and push into the toothpick so the eye is facing outDSC00540
  13. Repeat for second eyeballDSC00541
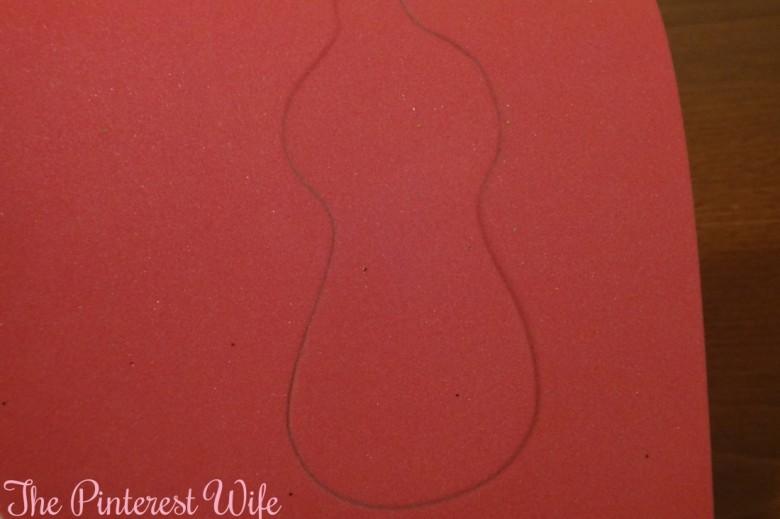
  14. Fold your red foam sheet in half and draw a squigle design on it (make sure it is narrow at the topDSC00545
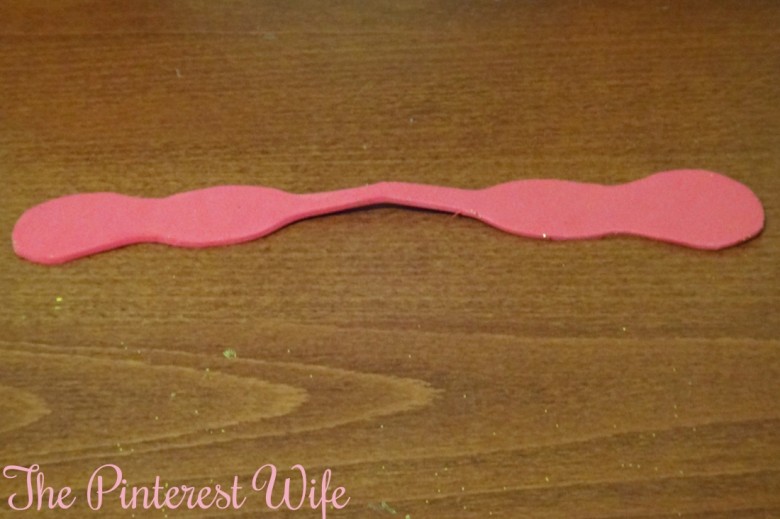
  15. Cut out the “gobble”DSC00546
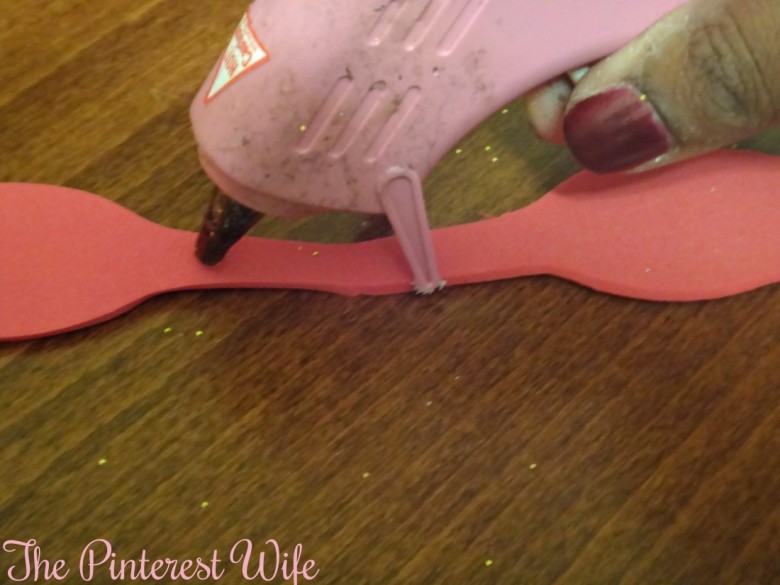
  16. Put hot glue on the narrow part and stick it onto the beak (yellow cone)DSC00550
  17. Take that piece of tulle you saved and hot glue it to the back of the wreath at the top so you have something to hang your wreath byDSC00555
  18. Name your wreath and hang him on the door!DSC00558Meet, Teddy the Turkey :)

Now, I am going to warn you, if you choose to use tulle that has glitter in it (like my yellow tulle) be prepared to have glitter EVERYWHERE and for it to be a bear to get rid of.  I was unaware of this when I bought my tulle and I can’t tell you how happy I am with only have one color with glitter on it, BUT I love glitter and everything that sparkles so I really like how my wreath ended up despite my lap looking like this….DSC00525

 Stay tuned for Snickerdoodle Apple Pie bars tomorrow.

**I am so thankful that I work in a profession that I not only love so much, but that I can constantly learn and grow in.**

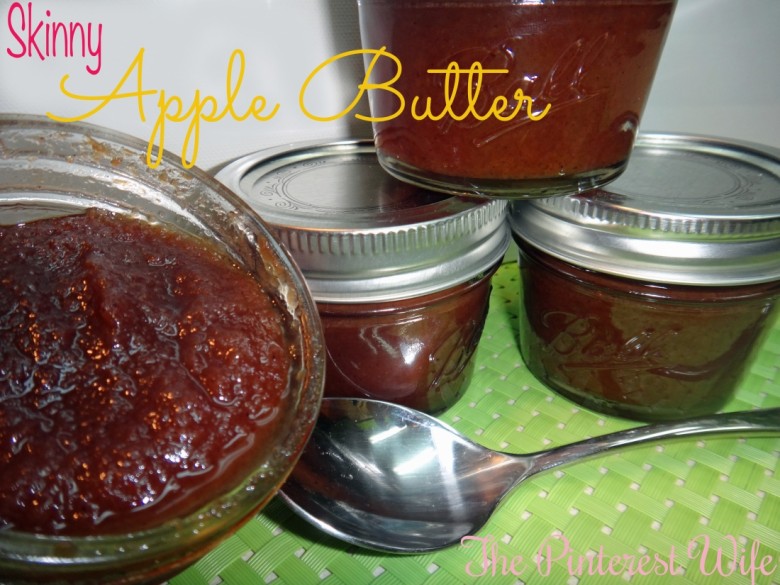
DSC00574Well hello there! I just realized that it’s November and I have yet to do any apple recipes for you all! Shame on me… Last year when Eric and I went apple picking, I wanted to make something with the apples we got.  I came across this recipe for skinny apple butter.  Now, I had never really been an apple butter person, but I knew that a lot of Eric’s family liked it, so I figured even if I didn’t like it would make a good gift!  Turns out, I actually liked it…a lot.  The best thing about this recipe is that it requires very minimal work on your part and yields a lot.  This year, I made some changes to the recipe just to see how it would turn out, and I actually liked it better.  I also took my first venture into canning this year…figured it would be better than giving it to people in Tupperware containers ;).

Ingredients

  • 13 apples (14 cups)
  • 2 C brown sugar
  • 1 C honey
  • 1/2 c apple cider
  • 2 Tbsp cinnamon
  • 1/2 tsp ground cloves
  • 1/2 tsp nutmeg
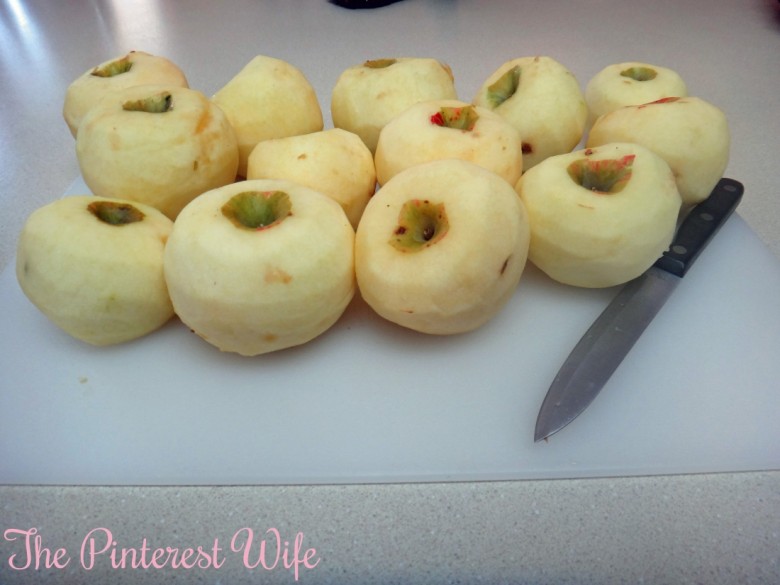
  1. Peel, core, and cut apples into cubesDSC00481   
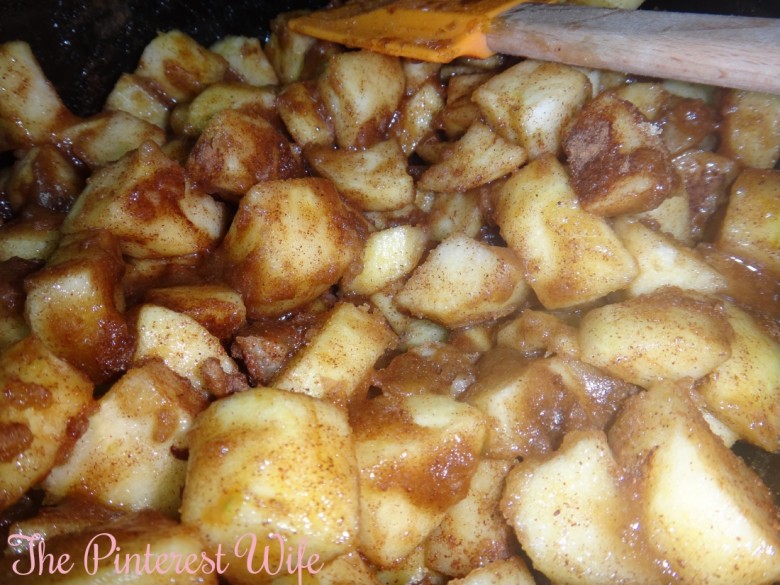
  2. Combine apples, brown sugar, honey, apple cider, cinnamon, ground cloves, and nutmeg in slow cooker and stir to combineDSC00482
  3. Cover and cook on low for 10 hours or until apples are tender
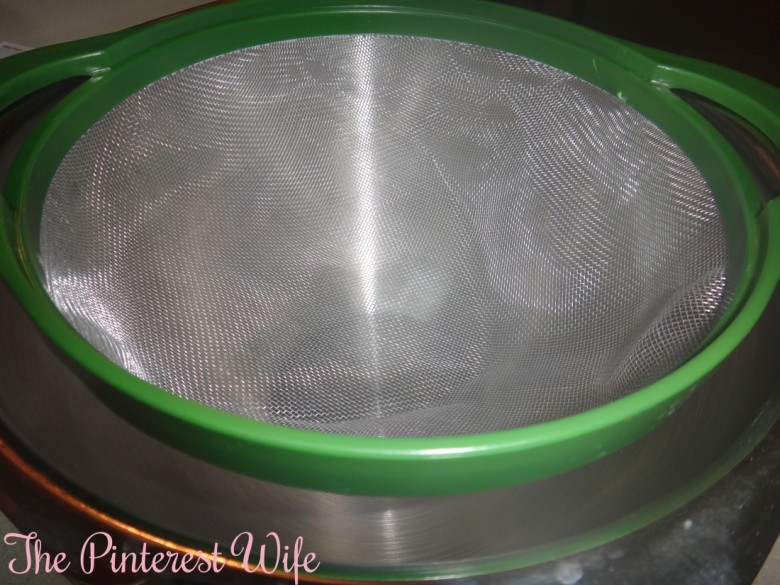
  4. Place a large fine mesh sieve over a bowlDSC00491
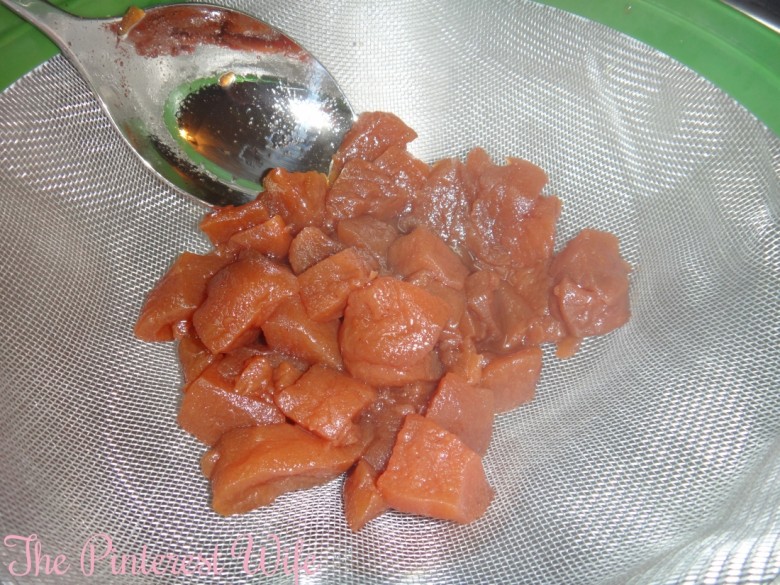
  5. Spoon a third of the apple mixture into the sieveDSC00492
  6. Using the back of a spoon, press the mixture through the sieve and discard the pulp.
  7. Repeat step 6 until all apples have been pushed through sieve
  8. Return apple mixture to your slow cooker and cook uncovered 1 1/2 hours or until mixture is thick, stirring occasionally *Note: make sure there is only 1/2 – 1 cup of liquid in the slow cooker before adding the apple mixture back to it.  If there is too much liquid, the apple butter will not get as thick as it should*
  9. Spoon mixture into jars & follow directions for canning.

*Note: This recipe can also be made on the stove.  Combine all ingredients in a dutch oven, cover, and cook for 1-2 hours or until apples are tender.  Follow steps 4-9.*

Skinny Apple Butter
A delicious fall treat that can be made overnight. Makes a great gift!
Write a review
Print
Prep Time
10 min
Cook Time
12 hr
Total Time
12 hr
Prep Time
10 min
Cook Time
12 hr
Total Time
12 hr
Ingredients
  1. 13 apples (14 cups)
  2. 2 C brown sugar
  3. 1 C honey
  4. 1/2 c apple cider
  5. 2 Tbsp cinnamon
  6. 1/2 tsp ground cloves
  7. 1/2 tsp nutmeg
Instructions
  1. Peel, core, and cut apples into cubes
  2. Combine apples, brown sugar, honey, apple cider, cinnamon, ground cloves, and nutmeg in slow cooker and stir to combine
  3. Cover and cook on low for 10 hours or until apples are tender
  4. Place a large fine mesh sieve over a bowl
  5. Spoon a third of the apple mixture into the sieve
  6. Using the back of a spoon, press the mixture through the sieve and discard the pulp.
  7. Repeat step 6 until all apples have been pushed through sieve
  8. Return apple mixture to your slow cooker and cook uncovered 1 1/2 hours or until mixture is thick, stirring occasionally
  9. Spoon mixture into jars & follow directions for canning.
Notes
  1. Make sure there is only 1/2 - 1 cup of liquid in the slow cooker before adding the apple mixture back to it. If there is too much liquid, the apple butter will not get as thick as it should
  2. This recipe can also be made on the stove. Combine all ingredients in a dutch oven, cover, and cook for 1-2 hours or until apples are tender. Follow steps 4-9.
Adapted from Cooking Light
The Pinterest Wife https://www.thepinterestwife.com/
Here’s a picture of our group at the apple orchard :)1381970_10200744381473233_1694853893_n


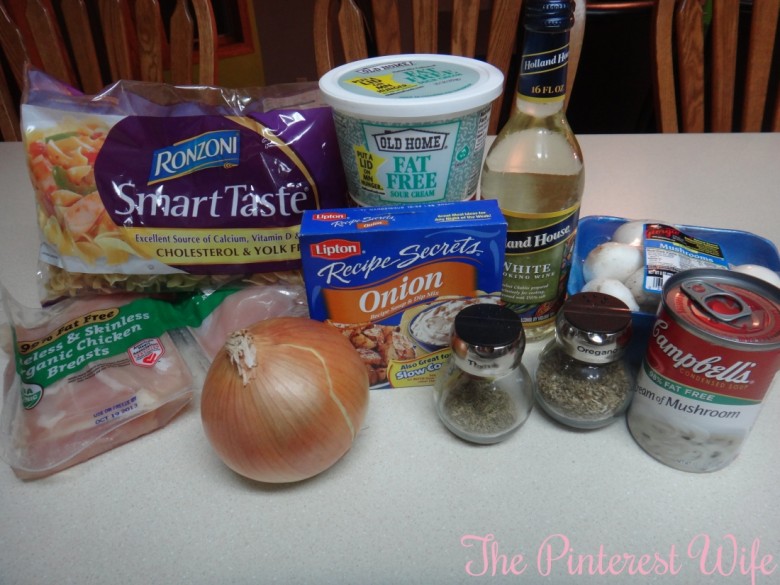
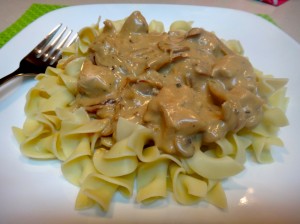
DSC004771Well hi there! It feels like it’s been forever since I’ve posted…I’m so sorry for neglecting you guys!  Life got totally and completely crazy and I had no time at all to post.  But I have been taking pictures of everything I’ve been making so there will definitely be lots of fun recipes to come in the very near future!  Anyways enough of my rambling…Tonight I come to you with one of the most authentic tasting skinny meals EVER!  This meal can either be made in the crockpot or on the stove.  I opted for the stove mostly because I wasn’t organized enough before work to get it together and needed to throw dinner together when I got home.  It was incredibly easy, pretty quick, and tasted AMAZING (Eric and Cole didn’t even know that it was a skinny version). I used a combination of a few pins to get my version.  One was from Skinny Kitchen and the other was from Penguins, Pasta, & Polka Dots.

Ingredients

  • 4 chicken breasts
  • 2 Tbsp. Olive oil
  • 1 large sweet onion
  • 8 oz mushrooms (optional)
  • 16oz fat free sour cream
  • 1/2 c white wine
  • 12oz noodles
  • 1 can 98% fat free cream of mushroom soup
  • 1 can 98% fat free cream of chicken soup
  • 1 pack of onion soup/dip mix
  • 1tbsp oregano
  • 1 tsp. thymeDSC00464
  1. Break the stems off the mushrooms and slice them fairly thin
  2. Slice your onion
  3. Add 1 Tbsp. olive oil to a pan and sautée onions and mushrooms until tender (about 5-7 minutes)
  4. While the onions and mushrooms are cooking, cut your chicken into cubes (approximately 1″)
  5. Add 1 tbsp olive oil to another pan and add chicken cubes until cooked through
  6. While chicken is cooking, and when the onions and mushrooms are tender, add sour cream, white wine, cream of mushroom, cream of chicken, onion mix, oregano, and thyme to the onion and mushroom mix
  7. Mix all together
  8. Once chicken is cooked, add to the sauce mix and bring to a boil
  9. When it starts to boil, turn heat to low and simmer uncovered for 10 min
  10. While sauce simmers, bring a pot of water to boil and cook noodles until tender
  11. Strain noodles and serve on plates
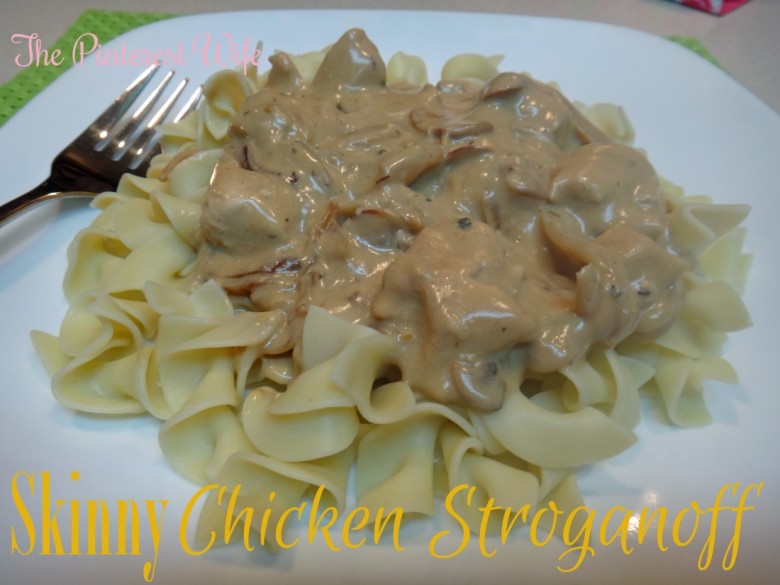
  12. Put desired amount of sauce on top of your noodles and enjoy!

*This can also be made in the crockpot.  Put all ingredients into your slow cooker and cook on low for 4-6 hours or high 2-3*

  1. Skinny Chicken Stroganoff
    Write a review
    Print
    Prep Time
    5 min
    Cook Time
    30 min
    Total Time
    35 min
    Prep Time
    5 min
    Cook Time
    30 min
    Total Time
    35 min
    Ingredients
    1. 4 chicken breasts
    2. 2 Tbsp. Olive oil
    3. 1 large sweet onion
    4. 8 oz mushrooms (optional)
    5. 16oz fat free sour cream
    6. 1/2 c white wine
    7. 12oz noodles
    8. 1 can 98% fat free cream of mushroom soup
    9. 1 can 98% fat free cream of chicken soup
    10. 1 pack of onion soup/dip mix
    11. 1tbsp oregano
    12. 1 tsp. thyme
    Instructions
    1. Break the stems off the mushrooms and slice them fairly thin
    2. Slice your onion
    3. Add 1 Tbsp. olive oil to a pan and sautée onions and mushrooms until tender (about 5-7 minutes)
    4. While the onions and mushrooms are cooking, cut your chicken into cubes (approximately 1")
    5. Add 1 tbsp olive oil to another pan and add chicken cubes until cooked through
    6. While chicken is cooking, and when the onions and mushrooms are tender, add sour cream, white wine, cream of mushroom, cream of chicken, onion mix, oregano, and thyme to the onion and mushroom mix
    7. Mix all together
    8. Once chicken is cooked, add to the sauce mix and bring to a boil
    9. When it starts to boil, turn heat to low and simmer uncovered for 10 min
    10. While sauce simmers, bring a pot of water to boil and cook noodles until tender
    11. Strain noodles and serve on plates
    12. Put desired amount of sauce on top of your noodles and enjoy!
    Notes
    1. This can also be prepared in a crockpot. Put all ingredients into crockpot and cook on low for 4-6 hours or high for 2-3
    The Pinterest Wife https://www.thepinterestwife.com/

Sooo one of my all time favorite foods is sloppy joes…seriously whenever it was on the menu at DG I made sure to be there.  When I stumbled upon this gem on pinterest I knew I had to give it a try.  I’m going to apologize in advanced: Eric and I don’t use buns in our house, and the sloppy joes looked really funny on sandwich thins and my favorite way to eat sloppy joes is with chips (Special K cracker chips, to be exact) SO the pictures in this post may not be the best…at least their with my camera and not my phone though!

Ingredients

  • 1 lb ground turkey (or ground beef)
  • 1 onion, diced
  • 1 can Healthy Request Tomato Soup (or any low sodium, low fat tomato soup)
  • 1/2 cup Ketchup
  • 2 Tbsp. Mustard
  • 1 Tbsp. Brown Sugar
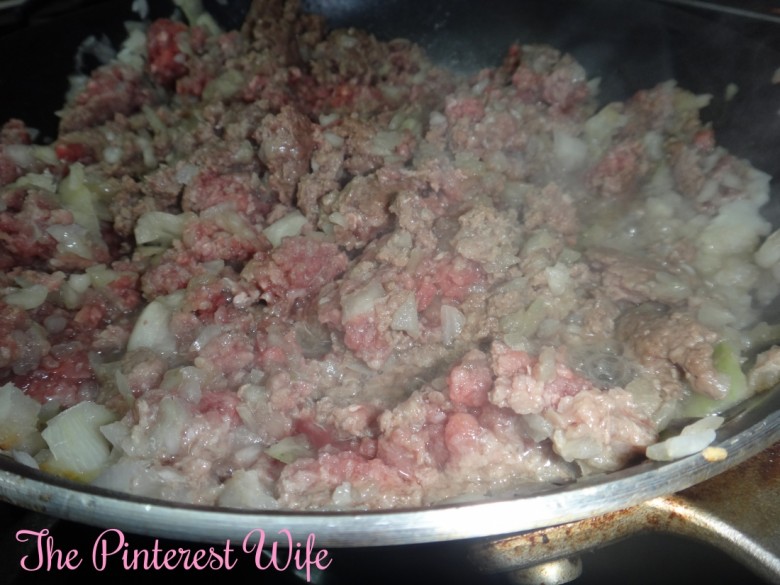
  1. Add turkey and onions to a large skillet and brown until turkey is cooked DSC00408
  2. Spray crockpot with nonstick spray (or use a crockpot liner)
  3. Add turkey, onion, tomato soup, ketchup, mustard, and brown sugar to the slow cooker
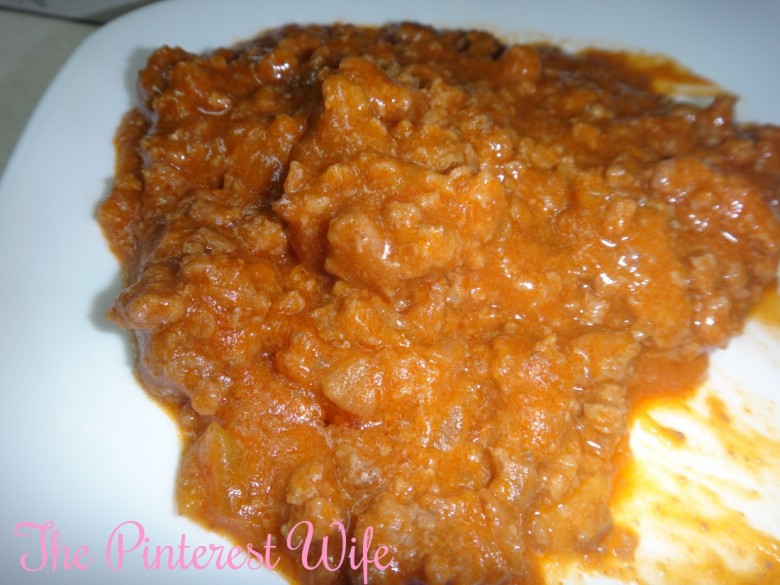
  4. Cook on low for 4 hours or high for for 1-2DSC00412

These sloppy joes were so good that Eric and I had to rock, paper, scissors to decide who would take the leftovers for lunch the next day…

Skinny Crockpot Sloppy Joes
A healthy take on a classic family favorite
Write a review
Print
Ingredients
  1. 1 lb ground turkey (or ground beef)
  2. 1 onion, diced
  3. 1 can Healthy Request Tomato Soup (or any low sodium, low fat tomato soup)
  4. 1/2 cup Ketchup
  5. 2 Tbsp. Mustard
  6. 1 Tbsp. Brown Sugar
Instructions
  1. Add turkey and onions to a large skillet and brown until turkey is cooked
  2. Spray crockpot with nonstick spray (or use a crockpot liner)
  3. Add turkey, onion, tomato soup, ketchup, mustard, and brown sugar to the slow cooker
  4. Cook on low for 4 hours or high for for 1-2 hours
Adapted from Six Sisters Stuff
The Pinterest Wife https://www.thepinterestwife.com/

 20131025-160821.jpg

Well the chilly Minnesota weather has officially set it, and wouldn’t you know it, our furnace decided to stop working on us.  Since our house was at around 60 degrees, Eric and I were craving something to warm us up, and what better to do that than Mexican?!  Now, typically, I would make fajitas with chicken, but we’re getting a little sick of chicken and decided to do steak instead.  Feel free to sub out any meat of your choice with these, just make sure you adjust cooking times accordingly.  I didn’t actually find a recipe I loved so I threw a few together and we were VERY happy with the outcome.  Although I did end up letting the meat marinate (mostly because I started and then had to go run a few errands) I made a rub instead of a liquid marinade, in the hopes of saving time.  Also, I’m not a huge fan of peppers so I only put one in this recipe.  If you like them feel free to add more or different ones.

Ingredients

  • 1 lb fairly thin steak (skirt steak is most commonly used but I used top loin)–you could also use chicken instead of steak
  • 2 tsp. Chili Powder
  • 1 tsp. Lite Salt
  • 1 tsp. Paprika
  • 1 tsp. sugar
  • 1 crushed up low sodium bouillon cube (chicken broth cube)
  • 1/2 tsp. onion powder
  • 1 tsp. garlic powder
  • 1 medium sweet onion
  • 1 Green Bell Peppers
  • 2 Tbsp. Olive Oil
  • 1 Tbsp lime juice
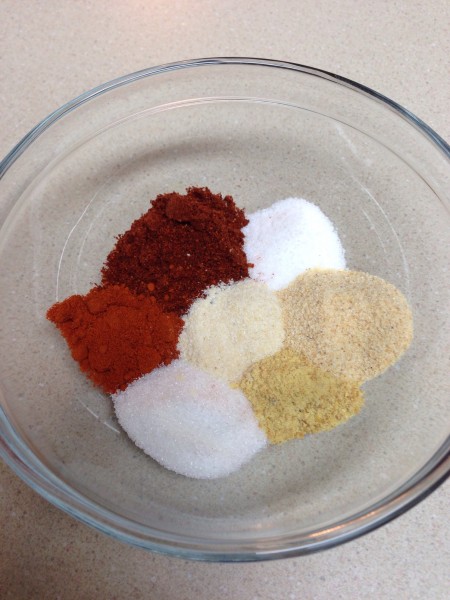
  1. Mix chili powder, salt, paprika, sugar, crushed up bouillon cube, onion powder, and garlic powder in a small bowl20131021-160739.jpg
  2. Spread the rub all over your meat making sure you get it all over (save about 1 tbsp. of the rub)
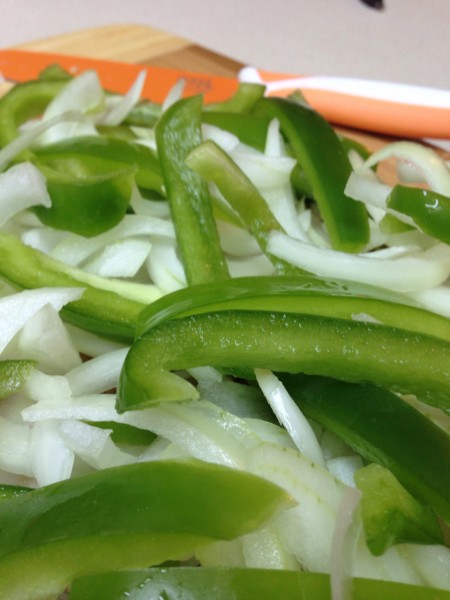
  3. Slice your onions and peppers thinly20131021-160802.jpg
  4. Heat 1 tbsp olive oil in a pan
  5. Saute your onions until tender (5-7 minutes)
  6. Put your meat on either the grill or a separate pan and cook about 6-7 min per side or until done to your liking (FYI, fajita meat is usually cooked medium or so it’s pink in the middle)
  7. Remember that rub you saved? Yeah, add 1 tbsp olive oil and the lemon/lime juice and mix it up
  8. Add the peppers and the marinade you just made to your pan with the onions
  9. Continue to saute until the peppers are tender (5 -7 min)
  10. Combine the meat with the peppers & onion20131021-160815.jpg
  11. Heat your tortillas on the grill or in the microwave
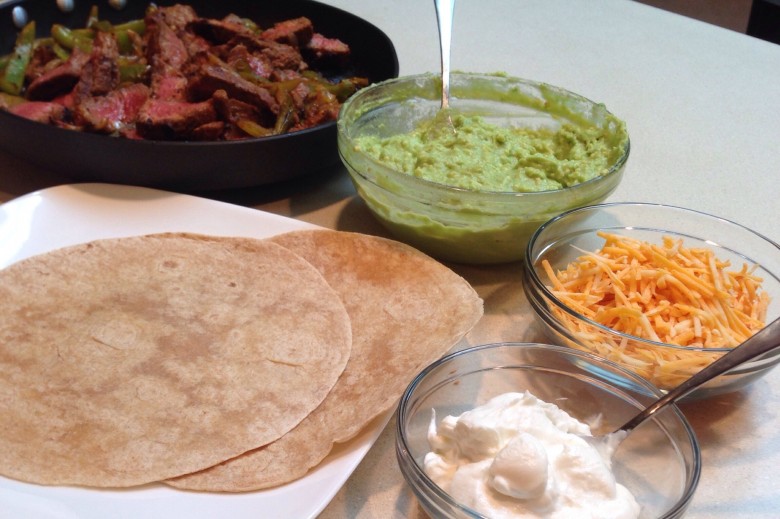
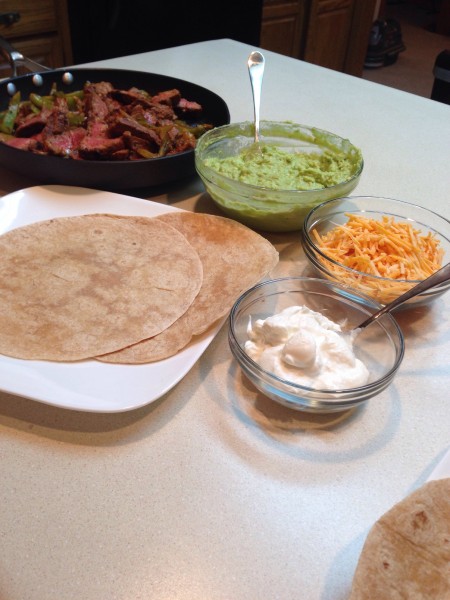
  12. Serve with sour cream, guacamole, cheese, lettuce, and tomatoes!20131021-160835.jpg

Steak Fajitas
Write a review
Print
Prep Time
10 min
Cook Time
15 min
Total Time
25 min
Prep Time
10 min
Cook Time
15 min
Total Time
25 min
Ingredients
  1. 1 lb fairly thin steak (skirt steak is most commonly used but I used top loin)--you could also use chicken instead of steak
  2. 2 tsp. Chili Powder
  3. 1 tsp. Lite Salt
  4. 1 tsp. Paprika
  5. 1 tsp. sugar
  6. 1 crushed up low sodium bouillon cube (chicken broth cube)
  7. 1/2 tsp. onion powder
  8. 1 tsp. garlic powder
  9. 1 medium sweet onion
  10. 1 Green Bell Peppers
  11. 2 Tbsp. Olive Oil
  12. 1 Tbsp lime juice
Instructions
  1. Mix chili powder, salt, paprika, sugar, crushed up bouillon cube, onion powder, and garlic powder in a small bowl
  2. Spread the rub all over your meat making sure you get it all over (save about 1 tbsp. of the rub)
  3. Slice your onions and peppers thinly
  4. Heat 1 tbsp olive oil in a pan
  5. Saute your onions until tender (5-7 minutes)
  6. Put your meat on either the grill or a separate pan and cook about 6-7 min per side or until done to your liking (FYI, fajita meat is usually cooked medium or so it's pink in the middle)
  7. Remember that rub you saved? Yeah, add 1 tbsp olive oil and the lemon/lime juice and mix it up
  8. Add the peppers and the marinade you just made to your pan with the onions
  9. Continue to saute until the peppers are tender (5 -7 min)
  10. Combine the meat with the peppers & onion
  11. Heat your tortillas on the grill or in the microwave
Notes
  1. Serve with sour cream, cheese, lettuce, tomatoes, and guacamole
Adapted from Closet Cooking & Key Ingredient
The Pinterest Wife https://www.thepinterestwife.com/
*PS, these pictures were all taken with my cell phone as well so sorry for the picture quality…The next post will be back to my camera, I promise!!*


20131021-122257.jpg

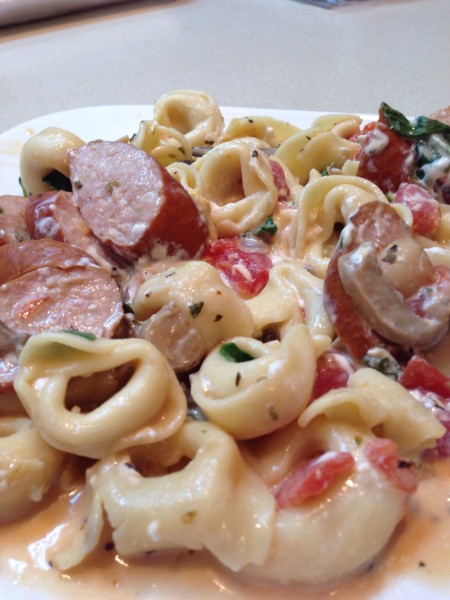
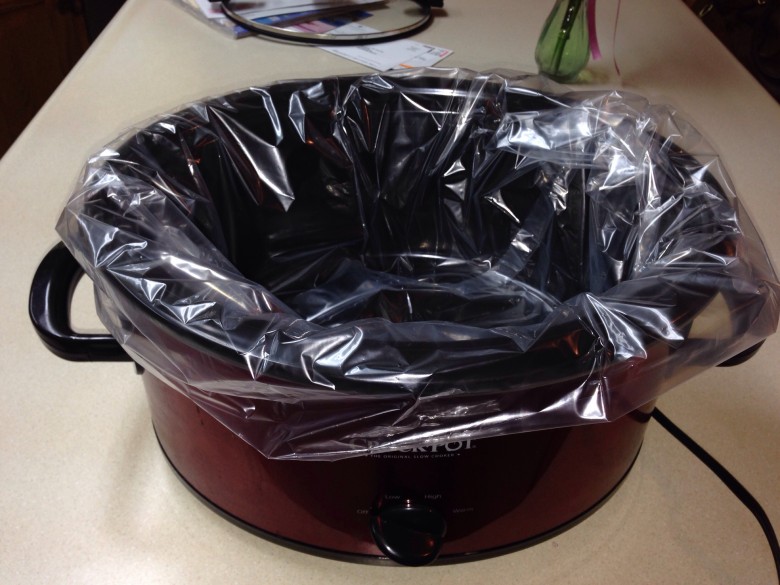
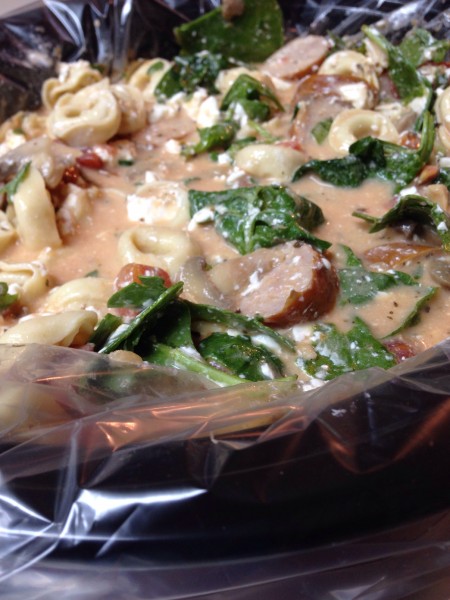
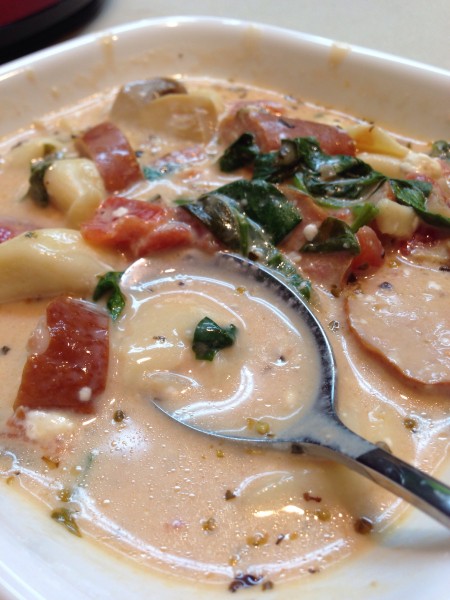
Well, the time of year most Minnesotans dread has finally rolled in my friends.  Fall time.  I, however, am not one of those people…I love absolutely EVERYTHING about fall.  From all things pumpkin and apple, to football season, to fashion (um hello boots, leggings, and sweaters?!), to two of my favorite holidays (Halloween and Thanksgiving) and I’m even a lover of the colder, fall weather.  This weather is perfect for sitting by your fireplace with apple cider, your hubby, and the pooch (…which is exactly what I did last night).  Fall time also means we can pull our beloved crockpots back out from their summer hibernation and let them know we really do love them, but just like our grills better in the summer.  Now, I’m not really a huge pasta fan but Eric is and this Sausage Tortellini recipe sounded really good.  Ok, so something the recipe didn’t say that I found out the hard way (but was happy with the outcome,) is that this recipe actually makes a Sausage Tortellini SOUP.  I am a huge soup person, my darling husband does not share in my enthusiasm.  If you’re like me and want to have this as cheesy, delicious soup, follow the recipe below, but if you just want the tortellini, use half the amount of chicken broth the recipe suggests and discard it after it’s done cooking. Also, if you don’t already use crockpot liners, add them to your next grocery list.  They will save you tons of cleaning up time, and you’ll thank me later.

*PS: Fall is my favorite cooking season so I hope you’re all ready for lots of pumpkin, apple, and crockpot recipes ;).*

….also on a side note, sorry the picture quality isn’t what it typically is, my camera was dead and the cord decided it didn’t want to work so I used my cellphone…

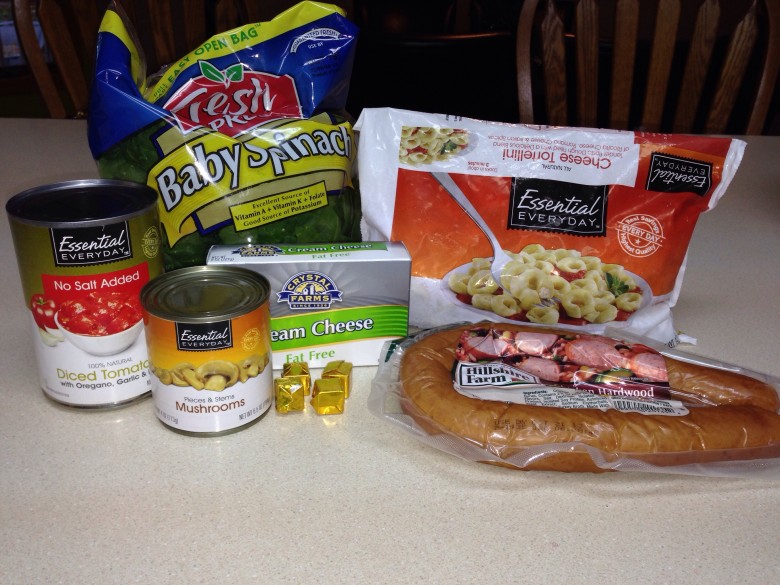
Ingredients

  • 1 Crock pot liner
  • 1 (19 oz) bag frozen cheese tortellini
  • 1 small bag of fresh spinach
  • 1 (14.5 oz) cans Italian style diced tomatoes, drained
  • 1 block (8 oz) fat free cream cheese
  • 1 lb chicken sausage (you could also use ground turkey)
  •  3 cups chicken broth (use 1-1 1/2 if you don’t want it as a soup)
  • 1 can mushrooms (optional)
  • 1 Tbsp. Oregano
  • 1 Tbsp. Basil
  • 1 Tbsp. Italian Seasoning20131021-122223.jpg
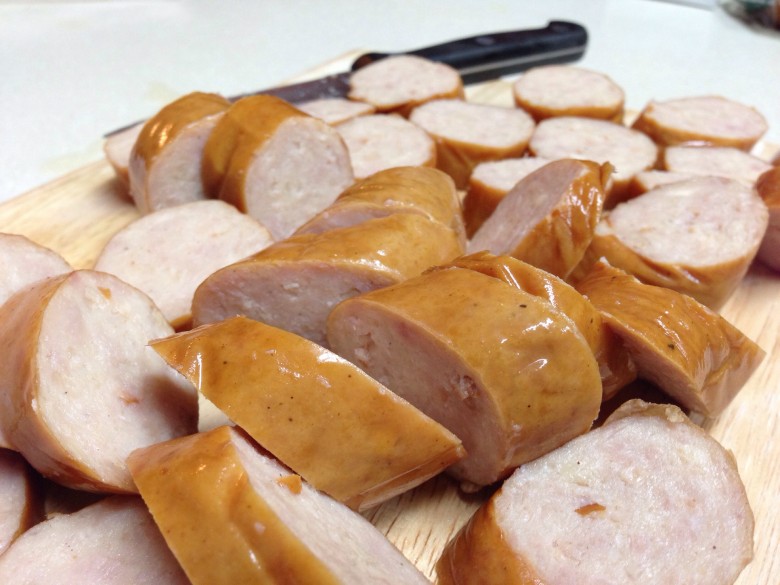
  1. Slice your chicken sausage into 1/2″ pieces20131021-122235.jpg

OR

  1. Brown your turkey meat until it is no longer pink
  2. Line your crockpot with liner OR spray with nonstick cooking spray20131020-224408.jpg
  3. Add all ingredients to the crockpot and stir well (really make sure you get the cream cheese broken up)20131021-122247.jpg
  4. Cook on High for 2-3 hours or low for 4-620131021-122320.jpg

Be sure not to over cook this.  Since all of the ingredients are already cooked, you’re really just heating them up and getting them to meld together.  Cooking for too long may result in soggy tortellini, and lets be honest, no one wants that.

Skinny Crockpot Sausage Tortellini
Easy, cheesy, delicious throw together meal. Can be made as a soup or just as tortellini.
Write a review
Print
Prep Time
10 min
Prep Time
10 min
Ingredients
  1. 1 Crock pot liner
  2. 1 (19 oz) bag frozen cheese tortellini
  3. 1 small bag of fresh spinach
  4. 1 (14.5 oz) cans Italian style diced tomatoes, drained
  5. 1 block (8 oz) fat free cream cheese
  6. 1 lb chicken sausage (you could also use ground turkey)
  7. 3 cups chicken broth (use 1-1 1/2 if you don't want it as a soup)
  8. 1 can mushrooms (optional)
  9. 1 Tbsp. Oregano
  10. 1 Tbsp. Basil
  11. 1 Tbsp. Italian Seasoning
Instructions
  1. Slice your chicken sausage into 1/2" pieces OR Brown your turkey meat until it is no longer pink
  2. Line your crockpot with liner OR spray with nonstick cooking spray
  3. Add all ingredients to the crockpot and stir well (really make sure you get the cream cheese broken up)
  4. Cook on High for 2-3 hours or low for 4-6
Notes
  1. Be sure not to over cook this. Since all of the ingredients are already cooked, you're really just heating them up and combining them together. Cooking for too long may result in soggy tortellini, and lets be honest, no one wants that.
Adapted from Never Trust A Skinny Cook
The Pinterest Wife https://www.thepinterestwife.com/