DSC01059
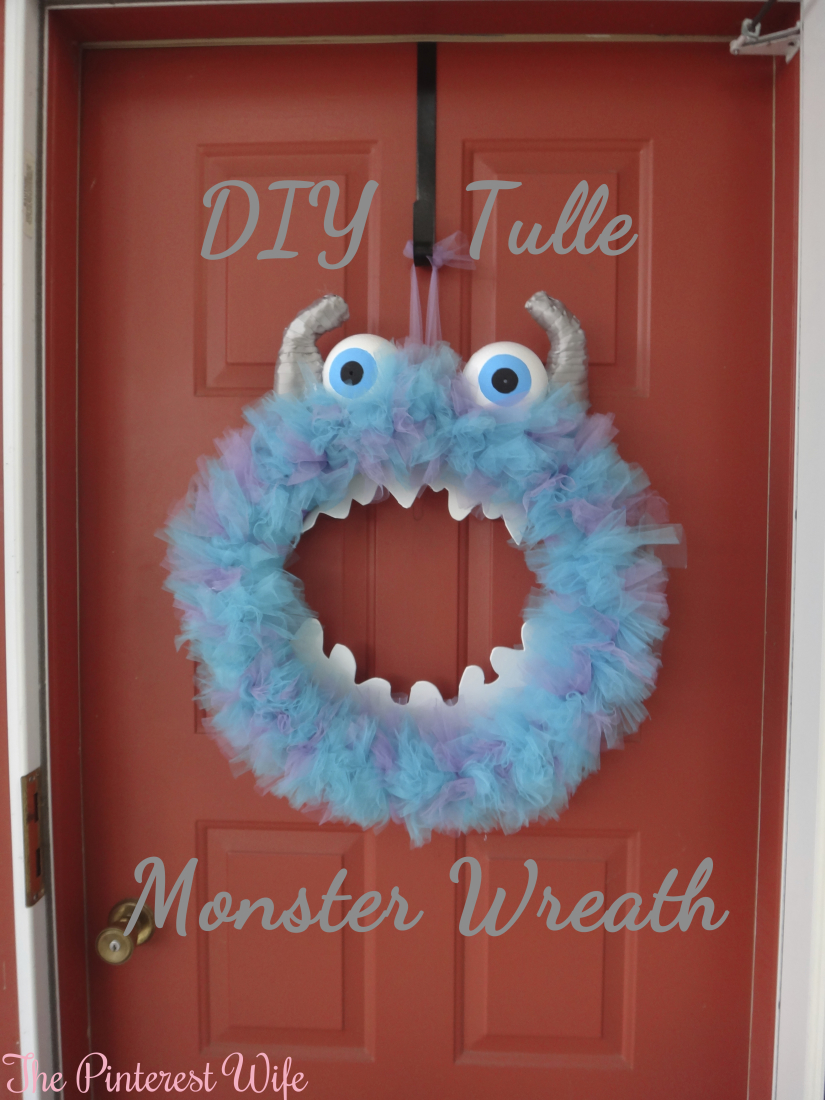
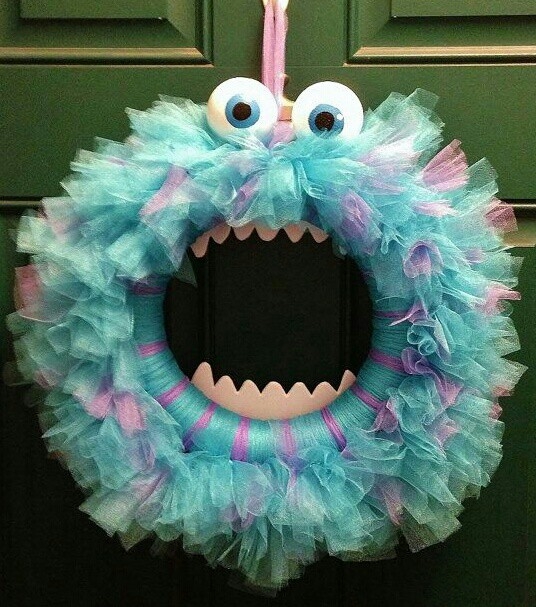
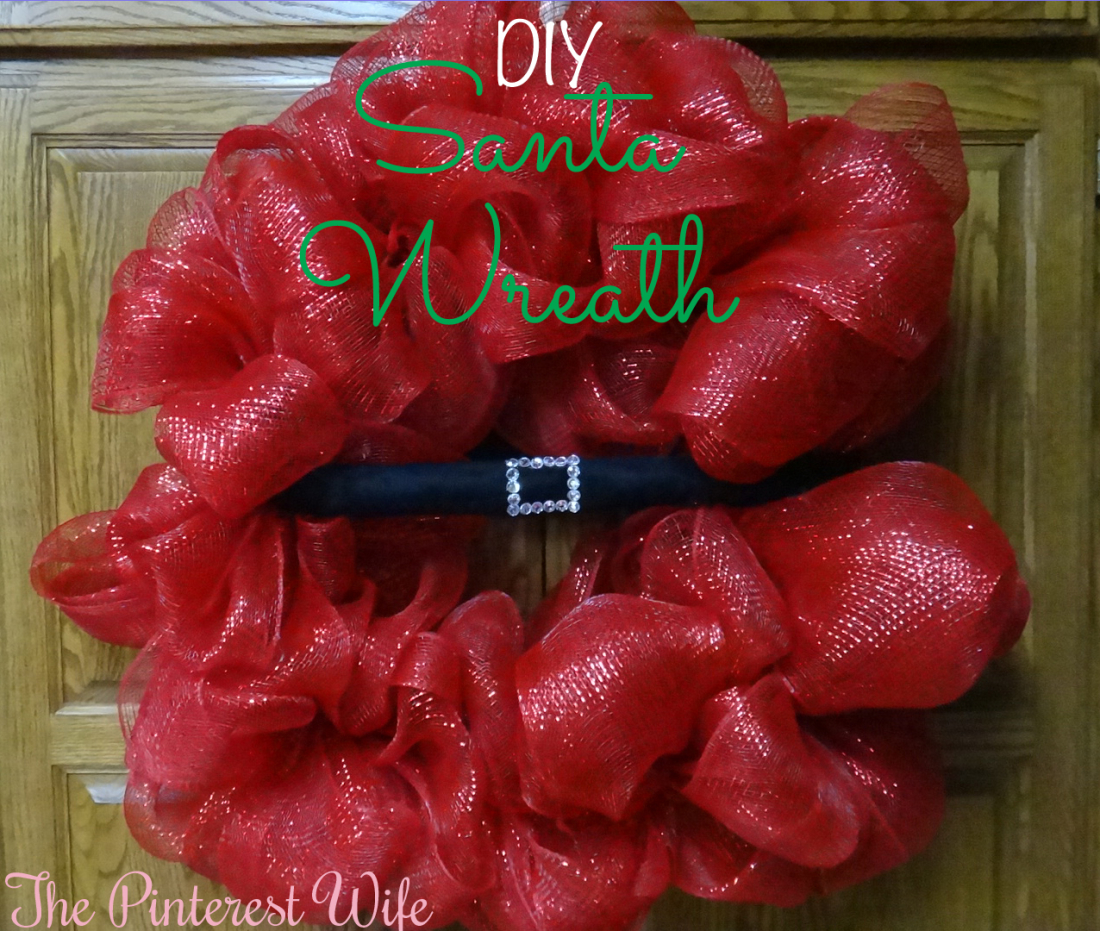
Happy Hump day! Wowzers, this week has been crazy busy and has just flown by! Today’s DIY gift is really perfect for just about anyone who gets into the holiday spirit.  We all know I love making [and giving] wreaths, so when I saw this wreath a few years ago, I just fell in love and knew I wanted to make it! There was no tutorial on it as the picture links to a listing on Etsy, so I figured I’d do one for you.cbe6a61cc96c3c9077404a81773df614

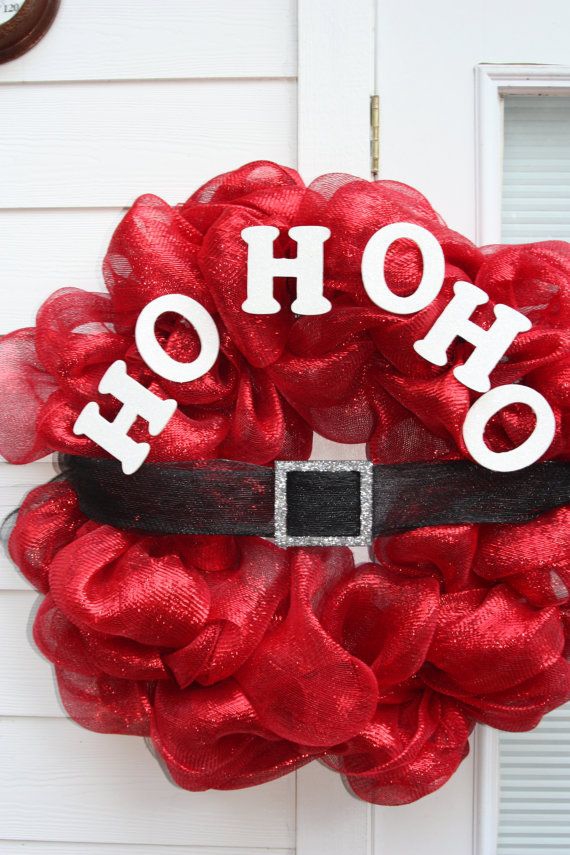
It isn’t too terrible difficult or time consuming so you still have time to make one and get it up on your door!
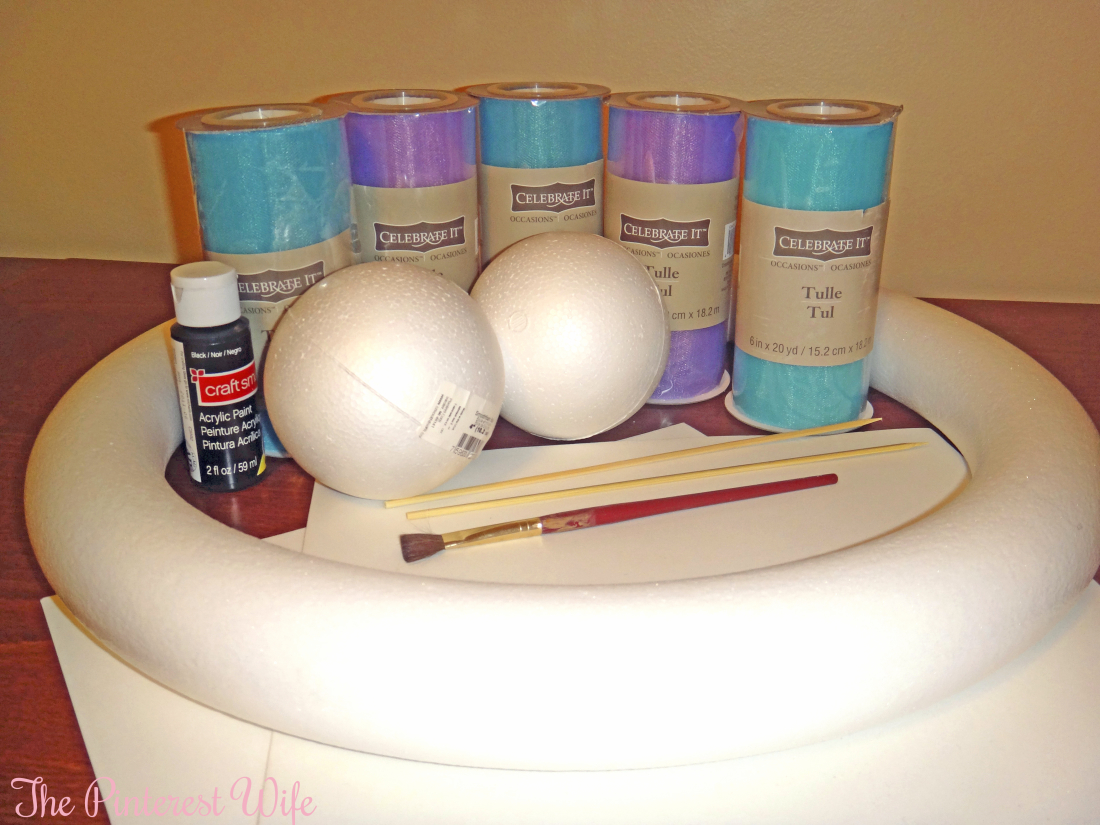
Materials:

  • 22″ or 24″ Wire Wreath Form
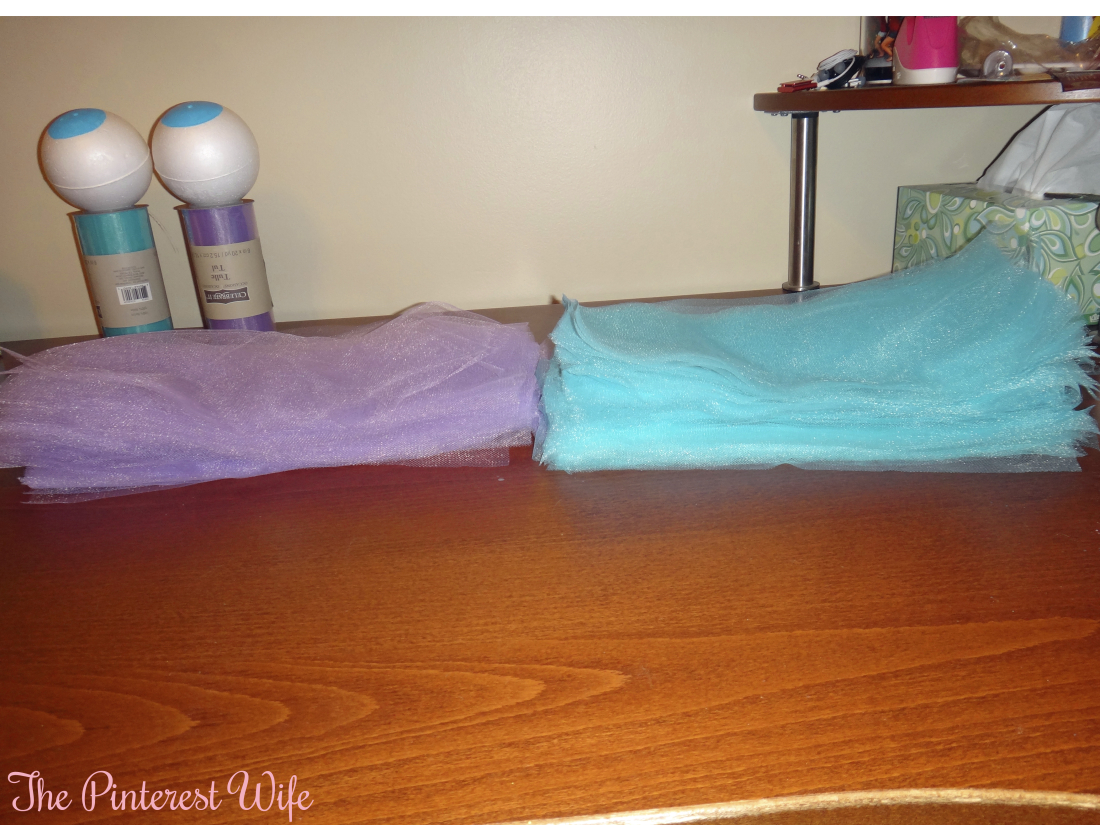
  • 1 roll 21″ Red Deco Mesh
  • Black tulle roll
  • Red Pipe Cleaners
  • Hot Glue Gun
  • Rhinestones

Instructions:

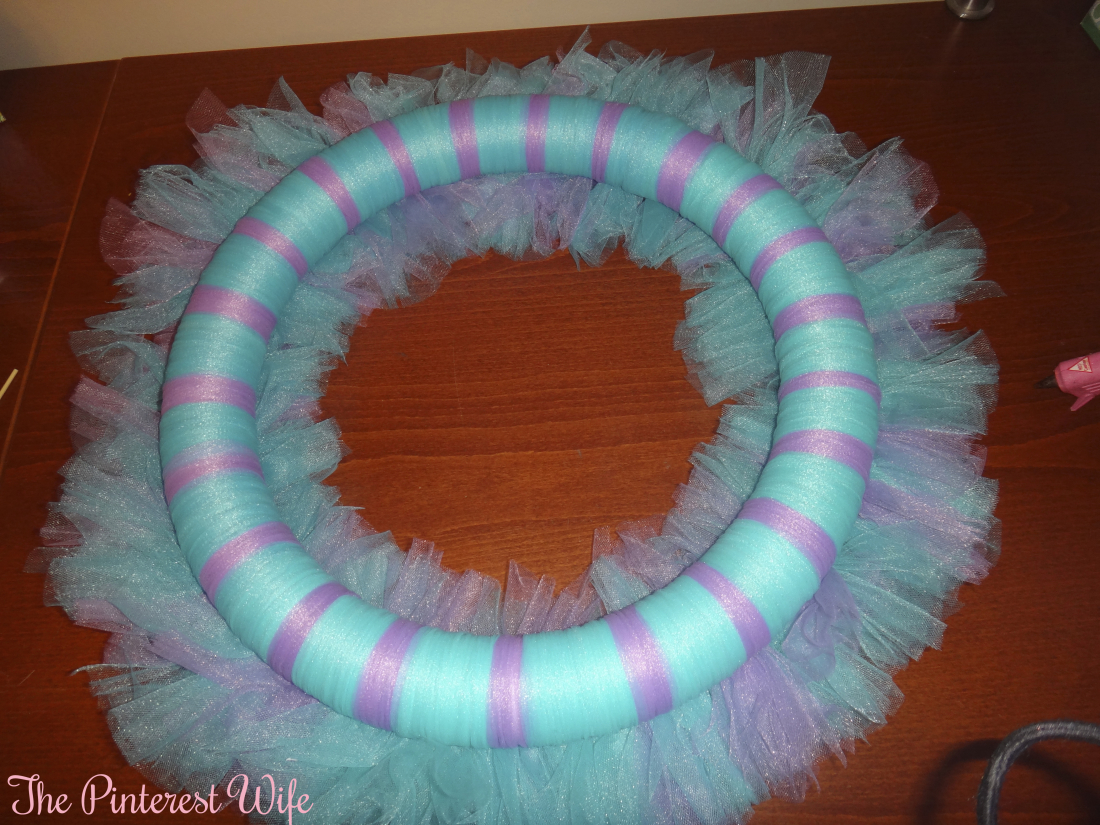
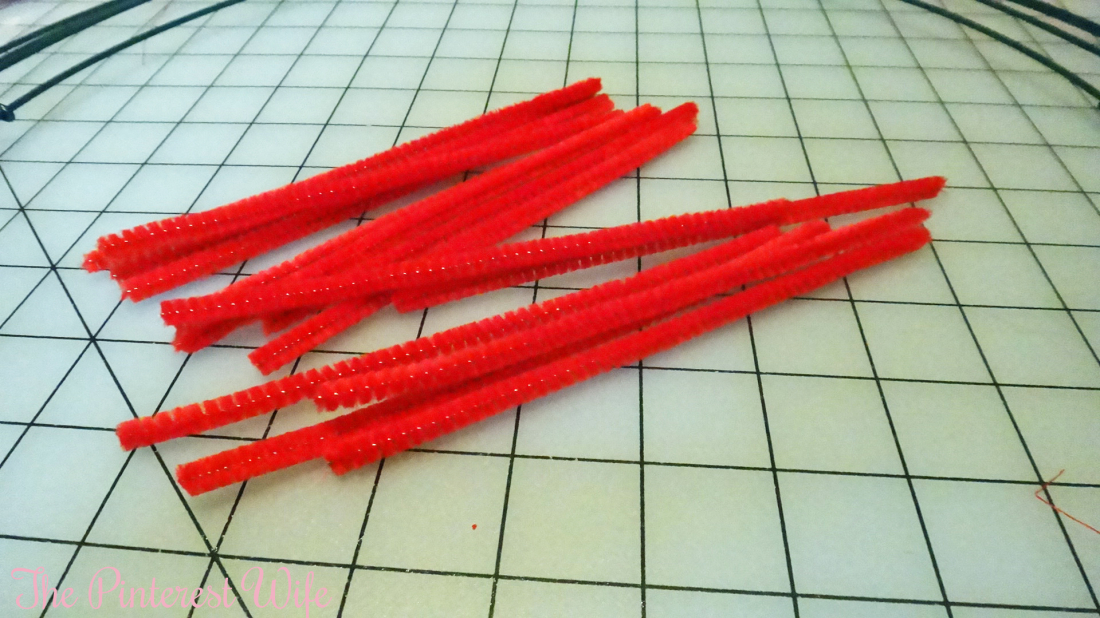
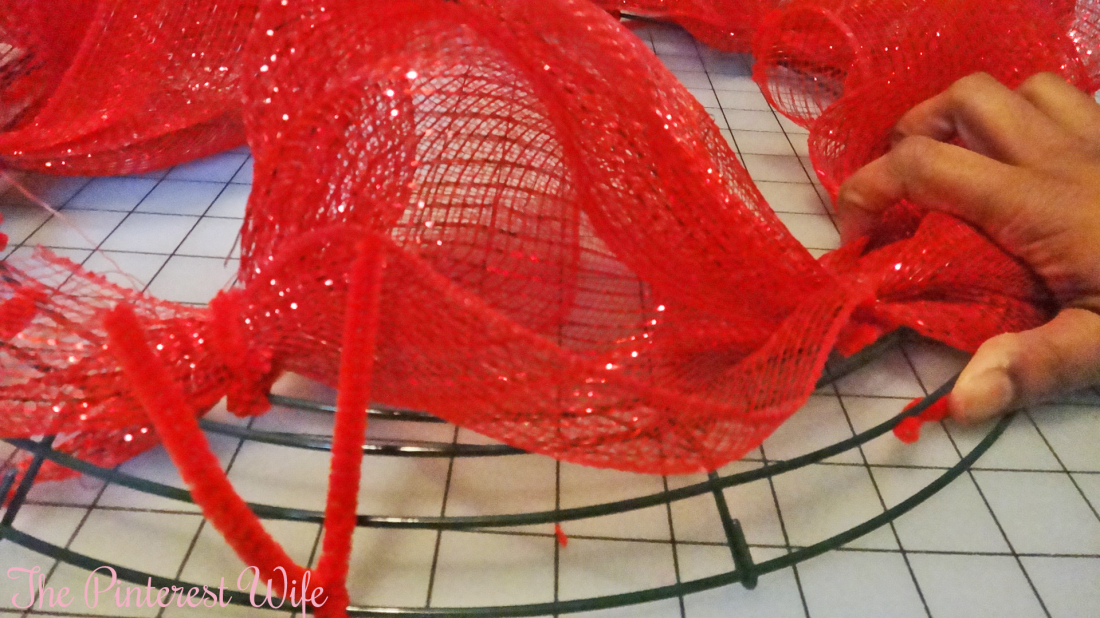
  1. Cut your pipe cleaners in halfDSC01049
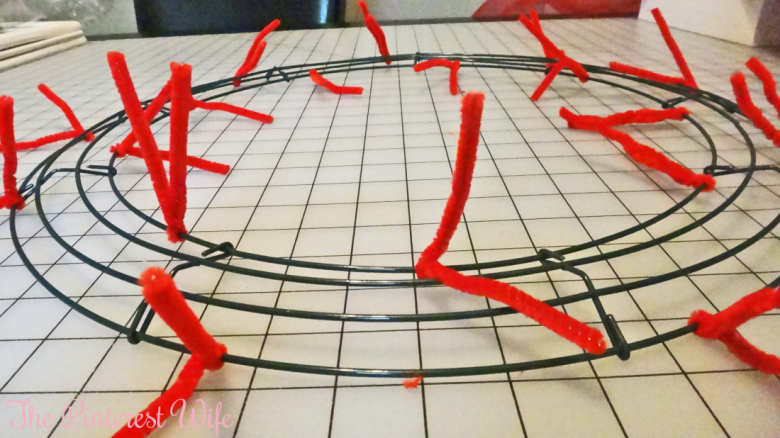
  2. Twist pipe cleaners around the wire wreath formDSC01050
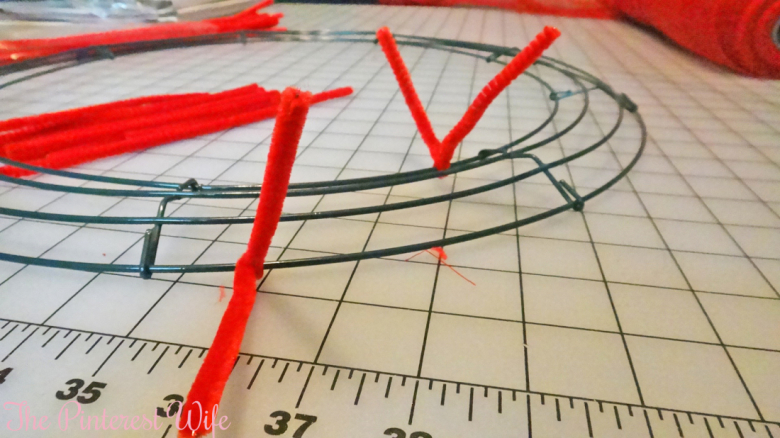
  3. Continue around the wreath, 1 per section on the inner most wire and 2 per section on the outer most wire. (Note: I ended up putting them around the middle two rows as well after finishing the outer and inner ones because it wasn’t full enough.  If you want it a little less full than mine, but still hiding the wreath form, fasten your pipe cleaners to the bottom two wires and the top two together.)DSC01051
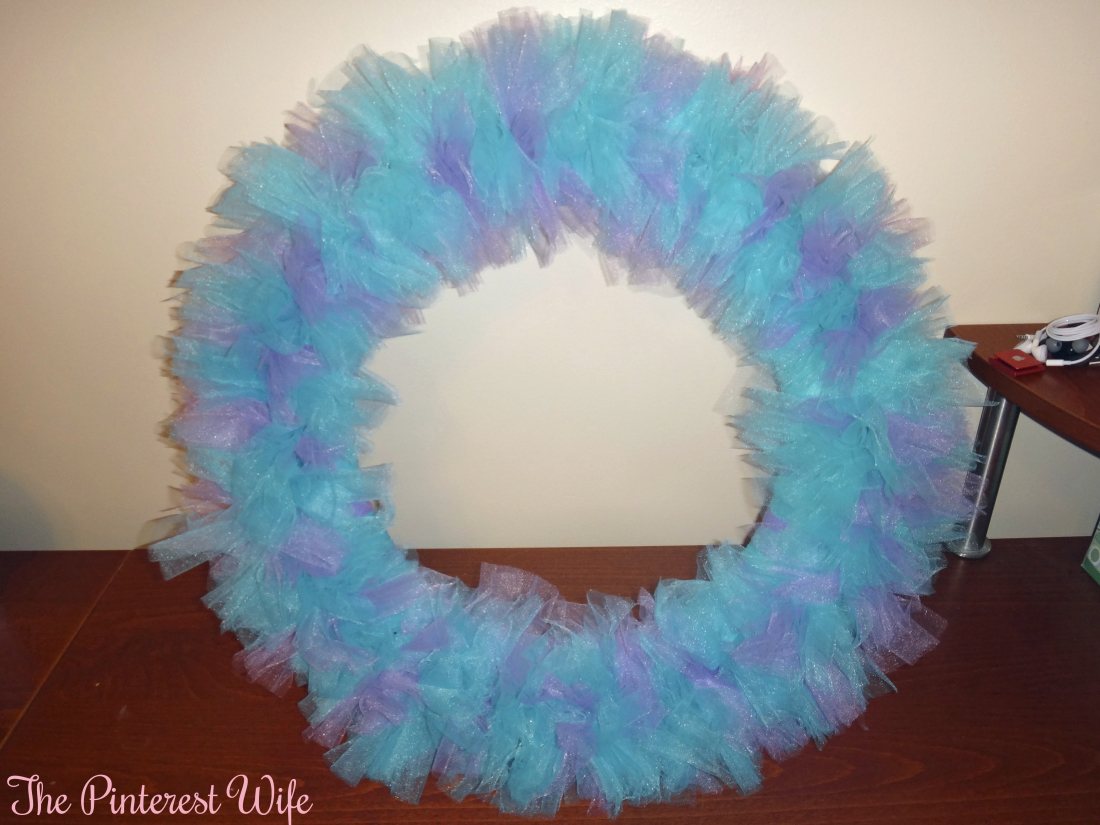
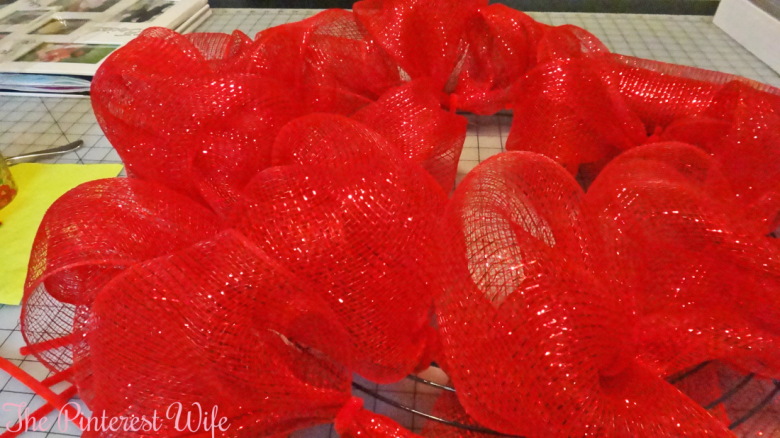
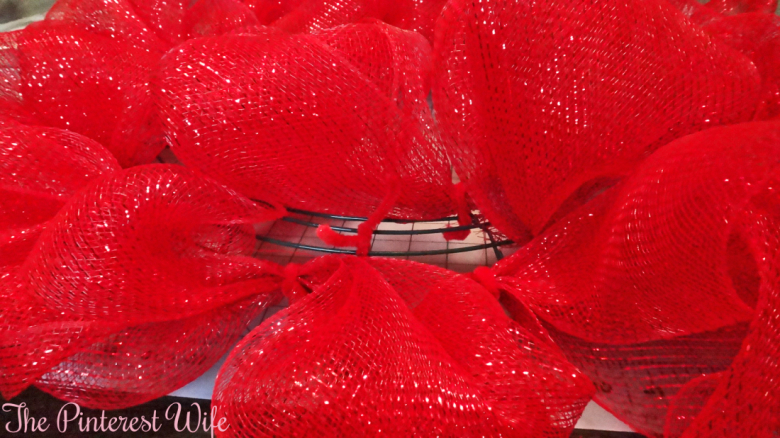
  4. Starting on the inner wire, gather the end of your mesh, scrunch it together and fasten in the middle of one of the pipe cleaners and twist the pipe cleaner to hold it in placeDSC01052
  5. Create half of a loop with the mesh between the first and second pipe cleaners on the inner wire and secure the mesh there by twisting the pipe cleaner around it.DSC01053
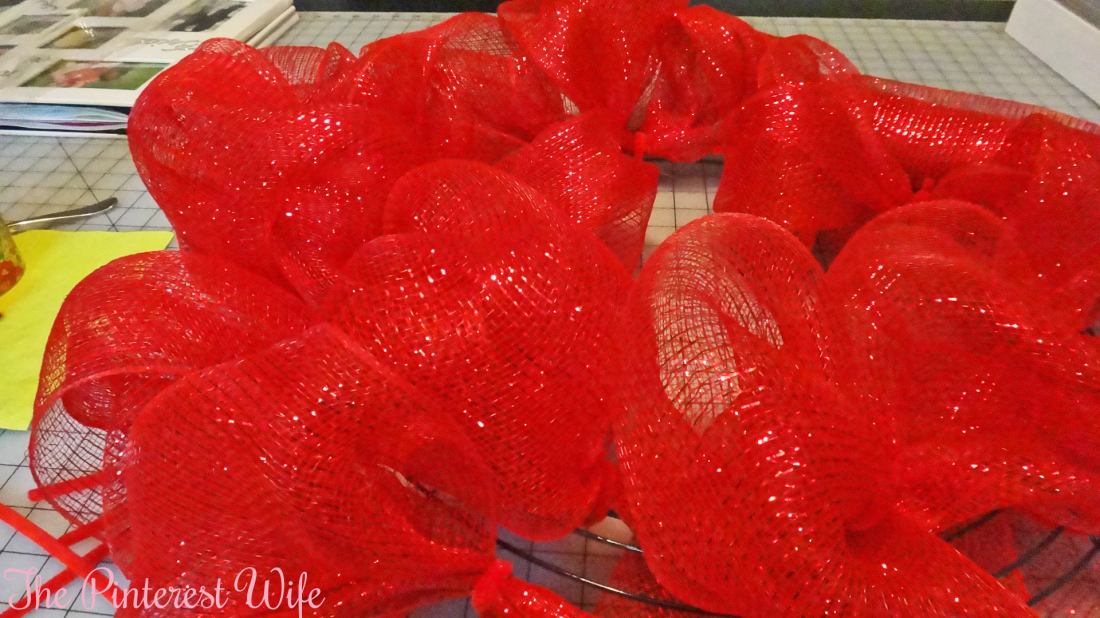
  6. Continue repeating this process for the inner ring and then move to the outer oneDSC01054
  7. OPTIONAL: If you have wire still showing or want your wreath to be more full, fasten pipe cleaners like you did in step 2 around the middle two wires and continue to secure the mesh through this row.DSC01055
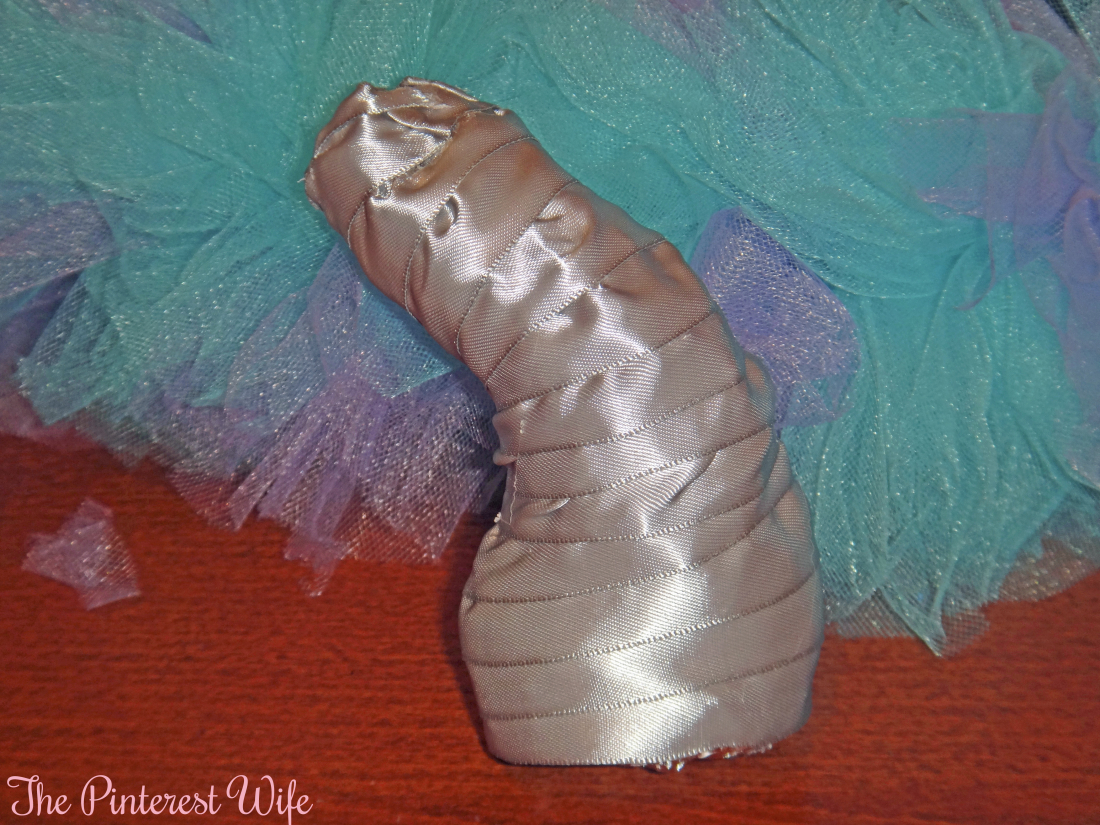
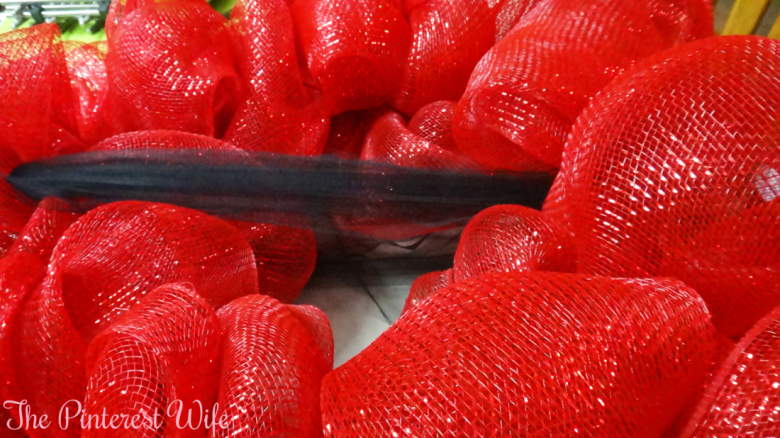
  8. Wrap your black tulle around the middle of your wreather several times until it looks how you want it to.DSC01056
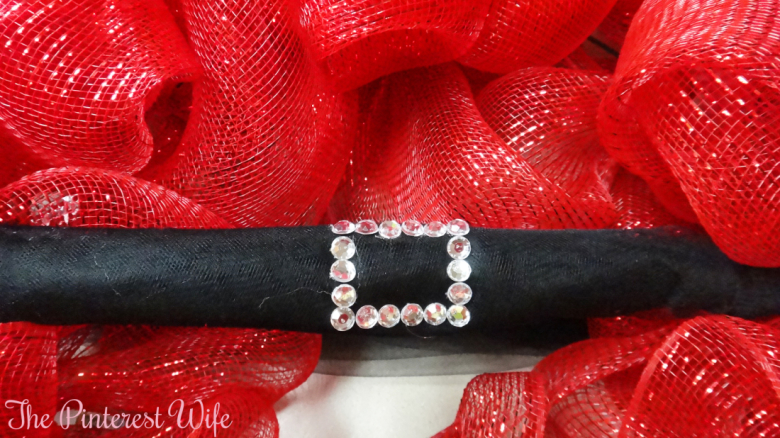
  9. Using your hot glue gun, stick rhinestones in a rectangle shape in the middle of the black tulle for the belt buckleDSC01057
  10. Tie a piece of Black tulle to the top of the wreath to use to hang the wreath
  11. Put it on your door and show all your neighbors that you’re no Scrooge!

Let me know if you have any questions and share pictures when you finish one!

DSC01044On the 5th day of Christmas my true love gave to me, 5 Gooooolden Riiiiingsssss…. butttt I can’t give you all golden rings, so instead I give you a tutorial for a baby blanket. This definitely requires a sewing machine, but not any extensive knowledge on how use said machine.  I’m a novice [at best] when it comes to sewing so this was my first big project and it wasn’t so painful :).  My best friend Dawn is an expert sewer and happened to be over when I was starting this project and gave me some great tips and tricks to make this process easier.  I made this blanket for my supervisor who just had an adorable baby girl last month. It’s super soft and makes the perfect gift for any new parent or soon-to-be parent. 

Materials

  • 1-1 1/2 yards Minky fabric (depending how big you want it to be)
  • 1-1 1/2 yards Printed flannel
  • Straight Pins
  • Safety Pins
  • Sewing Machine
  • Sewing Needle
  • Matching Thread
  1. Lay your fabrics out on a table with the minky on bottom and both right sides facing each other (Note: the minky will most likely be larger than the flannel so you can trim the excess off a bit, but still leave the minky ~1″ larger than the flannel)DSC01031
  2. Tip from Dawn: Starting in the middle, place safety pins every 6″-12″ (This keeps your fabrics lined up and avoids you getting really cranky at the end of your project when they don’t line up :) )DSC01033
  3. Place straight pins around the edge of your blanketsDSC01034
  4. Begin sewing your first three sides from end to endDSC01035
  5. On the fourth side, sew about 8 inches down and then leave a space unsewn ~6 inches long and begin sewing from that point to the end of that side. (This space is what you’ll use to flip the blanket right side out, but starting from the corner and leaving a gap in the middle just makes it easier to finish the blanket…another Dawn tip)
  6. After you’re done sewing, lay the blanket back out on your table and trim the minky to the size of your flannelDSC01036
  7. Cut the corners of the blanket diagonally from the point where the stitches begin.  (Dawn informed me that this makes the corners less “bulky”)DSC01038
  8. Flip your blanket right side out. (Dawn suggested using a crochet hook to push the corners all the way out if you’re struggling)DSC01039
  9. Fold both fabrics of the opening in towards each other (like the rest of the blanket) and pin closedDSC01040
  10. Begin hand sewing the opening shut, removing pins as you go.DSC01041
  11. Once it is all sealed up, weave your needle and thread back an inch or so on each fabric and cut your thread!DSC01042

See, not so painful :)DSC01043

DSC01048Happy Monday! Hope you all had a relaxing weekend and are starting to get into the holiday spirit. Today’s gift is very easy to make and could not be any cuter! These DIY Hot Chocolate Snowman kits make great gifts for coworkers or anyone you want to give a gift to but don’t want to spend a whole lot of money on. 

Materials:

  • Small glass jars (baby food jars work well, however I didn’t have access to anyone with baby food jars…I got mine from Joann’s for $1.)
  • Hot Glue Gun
  • Black Felt
  • Black Puffy Pain
  • Orange Puffy Paint
  • Ribbon for Scarf
  • Hot Cocoa mix
  • Mini Marshmallows
  • Crushed Peppermints or Candy Canes
  1. Put Hot Glue around the bottom of one jar and stick to the top of anotherIMG_7135
  2. Repeat with second jar to create your snowman’s bodyIMG_7136
  3. Cut a circle out of the felt 1-2 cm larger than the lid of the top jarIMG_7137
  4. Cut a strip of felt 1″-1 1/2″ wideIMG_7138
  5. Form the strip of felt into a tube the same size of the lid and hot glue to secureIMG_7139
  6. Place hot glue on the perimeter of the tube you createdIMG_7140
  7. Stick onto another piece of feltIMG_7141
  8. Cut out the excess felt to fit it to the tube and create the top of the hatIMG_7143
  9. Put another thin line of hot glue on the other side of the felt tube and stick it in the middle of the circle you cut out beforeIMG_7144
  10. Hot glue to the lid of the top jarIMG_7146
  11. Use puffy paint to make the snowman’s eyes, mouth, nose, and buttonsIMG_7152
  12. Fill the top jar with marshmallows, the middle with hot cocoa mix, and the bottom with crushed peppermintsIMG_7155
  13. Tie a scarf on between the top and middle jars, and he’s good to go!

-7Happy Day 3 of DIY gifts! Today’s gift could not be any easier to make and will most likely be something they will receive from anyone else.  Pure vanilla is pretty expensive…especially when you double the vanilla in pretty much every recipe like I do.  Making your own vanilla isn’t a whole lot cheaper, but it does taste a lot better!  The other perk is it takes very little work to make, but on the downside, it does require a little time.  There are several recipe’s for making your own vanilla so I took bits from each and decided how I wanted to make mine, but I encourage you to make adaptations and let me know how it turns out!!

Supplies

  • 5-7 Vanilla Beans (I bought mine at whole foods, but there are several places to order them online as well)
  • 500 mL Vodka
  • Glass bottle/mason jar

Instructions

  1. Cut the beans down the center leaving about 1 cm of the end connected-3
  2. Place in a jar or glass bottles-2
  3. Add Vodka to the bottle-4
  4. Place the lid on the jar and shake gently-5
  5. Allow to sit for 4-6 weeks for the alcohol to extract the vanilla from the beans

Notes: You can certainly try a different type of alcohol to make your extract.  I made a jar with Whiskey because a few people said that it makes for a more complex vanilla flavor.  Now, I’m no Vanilla connoisseur but I like whiskey so I figured I’d give it a try.  I also know several people who make theirs with rum so try out different options!  The only thing I will say when choosing your alcohol is that it MUST be at least 35% ABV in order for it to extract the vanilla. 

On the second day of Christmas my true love game to me…………

Photo Coasters! These gifts are very quick and incredibly easy to make [depending on the type of tile you choose to use, they can be quite budget friendly as well.]

Materials

  • 4″x4″ tile squares
  • Pictures printed on PAPER or TISSUE
  • Mod Podge
  • Foam Brush
  • Clear Bumpers/Felt Circles
  • Clear Acrylic Spray
  1. Format pictures to 4″x4″ and print on regular paperIMG_4370
  2. Cut out picturesIMG_4374
  3. Apply a thin layer Mod Podge to the tileIMG_4375
  4. Center picture on tileIMG_4380
  5. Using a pair of scissors, run one blade along the edges using light to medium pressure to distress the edges.  Continue until the edges are distressed to your desire. IMG_4381
  6. Apply 2 more coats of Mod Podge over the picture allowing to dry in between coats.IMG_4382
  7. Stick one clear bumper or small felt circle in each corner on the back of each coaster
  8. Spray 1-2 coats of the Acrylic Sealer to make your coasters water resistant

Any that’s all folks! I forgot to take a picture of all of the ones I made for her together…but I think you get the idea of what they end up looking like. *PS How stinkin CUTE are these two?!?1 Now you see why I had to make so many coasters…too many cute pictures to pick from!*

Side note: I would not recommend using regularly printed pictures (like on photo paper) to make these coasters.  They make it much more difficulty to distress them and because the paper is thicker, you need to do several additional mod podge coats to make the coaster smooth.  You could also print the pictures on tissue paper, which makes it much easier to distress and lends a much different look, but I, personally, liked the density in the images better when printed on computer paper.  If you try something different, let me know, I’d love to hear how yours turn out!

See you tomorrow for another DIY gift!

imageHi there! Hope you all had a wonderful Thanksgiving.  With the holidays drawing near, some of you may be looking for some gift ideas. Now I am someone who LOVES giving gifts, however that can get expensive…so I’m a big fan of making gifts! This also gives me a chance to personalize gifts for them.So I bring to you the 12 days of DIY gifts just in time for all of your holiday gift giving needs.

Day 1: This clock was something I had pinned a few years ago and just never got around to making for someone. One of my sorority sisters got married this summer and I thought this would be the perfect gift for them…not something you could buy in a store, but something they could display in their house for [[hopefully]] a long time. The hardest thing about this project was adding the clock template & words to the picture in Photoshop, prior to having it printed. You could totally nix this step and just use number stickers, but I like to make things more complicated for myself! Also, how CUTE are they?! I also made them coasters because their engagement pictures were too cute for me to just pick one.  I’ll be doing a tutorial on those as well during these 12 days!

Materials

  • 12×12 MDF board (mine was 1/8 inch) 
  • 12×12 photo (I had a 12×16 printed and then just trimmed it up, because that’s how Costco printed them) * you can choose whether you want to do all the editing in Photoshop or if you want to use stickers) 
  • Mod Podge
  • Paint to match your picture
  • Clock Parts
  • Optional: glitter, stickers, other embellishments

Instructions

  1. Like I said, I started by putting this picutre into photoshop and added their last name and wedding date and some fancy glow behind it.  By NO means am I a photoshop buff.  I only use it for blog related things…I don’t even use the full version of it.  I also added in my numbers so that when I printed the picture I was all good to go. *Note: If you plan on making multiple as gifts, I would reccommend saving your clock template as a layer that you can reuse so you don’t have to go through the process of measuring it out accurately each time.*IMG_4379
  2. Find the center of your board and drill a hole big enough for your clock parts to fit through
  3. Paint the edges of your board so you don’t see any edges when put the picture onIMG_4373
  4. Put a layer of Mod Podge on the boardIMG_4378
  5. Place your picture on topIMG_4383
  6. Optional: add glitter to you numbers or any other embellishments you want on the clock
  7. Add a layer of Mod Podge to the top of your clock, ensuring that you’re covering the edges as well to seal it all in, and allow it to dryIMG_4384
  8. Put one more layer of Mod Podge on
  9. Poke a hole through your picture in line with your drilled hole
  10. Assemble your clock parts according to the directions,
  11. Set the time and VOILA!IMG_4386

See you tomorrow for another DIY gift!

DSC00454Hi Friends! Well, my favorite season is among us and I’m just getting around to posting on it! Be ready for a barrage of all things apple, pumpkin, and festive.  For those of you who don’t know, Halloween is my third favorite holiday and while I’m not one to go all out decorating my house, I do love dressing up and putting up a few decorations to add to the festivities.  I’m also a huge fan of carving or painting pumpkins.  I actually made this wreath last year the night before Halloween and have been WAITING all year to put it up! sullySomething you may not know about me, is that I’m a giant Pixar lover. Like, huge.  I definitely own more Pixar movies than any 20 something should own…no shame whatsoever.  Since Pinterest only had a picture of this wreath and not a tutorial, I went to my trusty friend, google and found this AMAZING tutorial on making a monster wreath.  With that being said, if you’re not digging the whole Monsters Inc thing, you can definitely just make this a monster wreath and choose different color tulle.  Other modifications you can make are nixing the horns, changing the size, and adding any other monster-ish features.

DSC00431Materials:

  • 1 Styrofoam wreath (mine was 16″)
  • 2 Styrofoam balls (mine were 3″)
  • 100-120 yards of tulle that comes on a spool (NOT the kind you need staff to cut for you)
  • Blue (or whatever eye color you want) and Black paint
  • Paint brush
  • 2 sheets of white foam
  • Hot Glue Gun
  • Toothpicks or Bamboo Skewers
  • Alluminum Foil
  • Grey Ribbon
  1. Set the wreath on top the white foam sheet and outline the top quarter of the INNER part of the wreath onto the foam sheet and draw teeth. 
  2. Cut out and repeat for the lower teeth
  3. Paint 1″ blue circles on each of the Styrofoam balls and set aside to dry.  After it dries, paint on smaller circles for the pupilsDSC00435
  4. Wrap blue tulle around a cereal box or some piece of cardboard ~12 inces, vertically until the roll is goneDSC00438
  5. Cut tulle on the top and bottom of the box/cardboard to make stripsDSC00439
  6. Repeat with the other blue roll and purple roll (or whatever other colors you chose) DSC00440
  7. Begin tying the tulle around your wreath alternating 7 blue and 3 purple until the whole wreath is covered.  As you tie the tulle on, slide it so they are packed in tightly.DSC00447
  8. Make sure all of the knots are aligned, and fluff the tulle so the purple areas are mixed in intermittentlyDSC00446
  9. Hot glue the teeth to the top and bottom inner rim of the wreath
  10. Stick toothpick or bamboo skeewers into the bottom of the eyeballs and stick in into the outer, top part of the wreath.  Hot glue around the eyeballs to secure it to the wreath.DSC00448
  11. Use Aluminum Foil to form horns DSC00452
  12. Wrap horns in grey ribbon and secure with a dot of hot glueDSC00451
  13. Attach the horns outside of the eyeballs and a ribbon in the middle of the wreath and VOILA! You got yourself a Sully!DSC00453


IMG_5431

Hiya friends! I hope you guys have all been having a wonderful summer! It has been wedding SEASON for me the last few weeks.  Between weddings, showers, and bachelorette parties, it’s a miracle I’m still breathing!  A few weeks ago, I had the opportunity to host one of my best friend Jenna’s bridal shower and bachelorette party.  As you all know, I like to find ANY opportunity to craft/put glitter on things, so I made almost all of the decorations for her shower.  I bought a lot of things from the dollar store and made them fit my theme…which was pink and gold…and by gold I mean glitter!! All of my inspiration came from pinterest (obviously), so I thought I’d share tutorials since some of the pictures didn’t actually have instructions on them :)


The first thing I did was cake platters with a glittered stem.  These were incredibly easy, quick, and cheap!

Materials:

  • Round plastic tray (Dollar Store)
  • Glass Candle Stick holder (Dollar Store)
  • Gold Glitter–or any color of your choice
  • Mod Podge
  • Foam brush
  • Clear protective spray paint
  1. Spread an even layer of Mod Podge on your candle stick holder using a foam brushIMG_5373
  2. Sprinkle Glitter all over the holderIMG_5374
  3. Allow to dry
  4. Spray with a clear, protective sealIMG_5398
  5. Add hot glue to the top of the candle stick holderIMG_5399
  6. Center the tray and place on top of the candle stick holder.IMG_5400

VOILA!!


The second thing I made was the vases for a centerpiece (which are by far my favorite thing I made) These were also super quick, easy, and cheap.  I got the vases at the dollar store, and already had the glitter, mod podge, and tape so I didn’t need to get anything else! They were such a hit that Jenna is going to be using them in her wedding along with another friend who was at the shower!

Materials

  • Glass Cylinder vases (Dollar Store)
  • Painters Tape
  • Mod Podge
  • Foam Brush
  • Glitter
  1. Place tape on the vase up to the point you want the glitter to stop (I did it about 1/3 of the way up from the bottom)IMG_5369
  2. Brush an even coat of Mod Podge from the tape to the base of the vase using a foam brushIMG_5370
  3. Sprinkle glitter on top of the Mod PodgeIMG_5371
  4. Allow it to dry for ~30 minutes
  5. Place another coat of Mod Podge on top
  6. Take the tape off immediately after

Fill the vase with flowers or water and float a candle in it for an easy, elegant centerpiece!


I also painted the letters that I put up on the wall and on the tables… Just bought them at JoAnns, painted them the shower colors, and voila!


Happy crafting!

IMG_4588Hope you all had a wonderful and relaxing holiday weekend! Well, Minnesota has finally got a dose of summer with a few 90 degree, hot, humid days.  When it gets to be a true Minnesota July, the only thing I want to eat for lunch is something light.  I’ve always been a fan of egg salad sandwiches, but lets be honest…no one likes what all that mayonnaise does to the waistline… This recipe from over at Damn Delicious was amazingly good and it didn’t even taste “healthy.” One of Eric’s least favorite foods is eggs, but I had him try these and even he liked them and made a sandwich for his lunch the next day as well.  The best part about this recipe is how quick and easy it is.  It’s absolutely perfect for whipping up so you can have your lunch prepared for a few days. There are tons of variations and things you can add/forgo to suit your tastes.  Let me know what you guys think!

Ingredients:

  • 8 Large Eggs
  • 2/3 Cup Plain Greek Yogurt
  • 1 Tbsp. Lite Mayonnaise
  • 1 tsp. dill (you could add more, I’m just not a huge fan of dill)
  • 1/2 tsp. Paprika
  • 1/4 tsp. onion powder
  • 1/2 tsp. garlic powder
  • Salt & Pepper to taste
  • Optional: 1 Roma Tomato or 1 Tbsp. chopped chives
  1. Place eggs in a single layer at the bottom of a pot and fill with cold water until it is 1″ above the eggs
  2. Bring to a boil and let them cook for 1-2 minutes.
  3. Place a tight fitting lid on the pot and remove from the heat.  Set aside for 10 minutes
  4. Drain water from pot and let eggs cool
  5. Peel & dice eggs IMG_4584
  6. In a large bowl, combine diced eggs with Greek yogurt, lite mayo, dill, paprika, onion powder, garlic powder, salt/pepper, and any other ingredients you choose to add.IMG_4585
  7. Mix together until thoroughly combinedIMG_4586
  8. Serve on wheat bread or King’s Hawaiian Buns
Skinny Egg Salad
A healthier take on a classic lunch favorite that is perfect to make ahead for those busy work weeks!
Write a review
Print
Prep Time
12 min
Cook Time
3 min
Total Time
15 min
Prep Time
12 min
Cook Time
3 min
Total Time
15 min
Ingredients
  1. 8 Large Eggs
  2. 2/3 Cup Plain Greek Yogurt
  3. 1 Tbsp. Lite Mayonnaise
  4. 1 tsp. dill (you could add more, I'm just not a huge fan of dill)
  5. 1/2 tsp. Paprika
  6. 1/4 tsp. onion powder
  7. 1/2 tsp. garlic powder
  8. Salt & Pepper to taste
  9. Optional: 1 Roma Tomato or 1 Tbsp. chopped chives
Instructions
  1. Place eggs in a single layer at the bottom of a pot and fill with cold water until it is 1" above the eggs
  2. Bring to a boil and let them cook for 1-2 minutes.
  3. Place a tight fitting lid on the pot and remove from the heat. Set aside for 10 minutes
  4. Drain water from pot and let eggs cool
  5. Peel & dice eggs
  6. In a large bowl, mix diced eggs with greek yogurt, lite mayo, dill, paprika, onion powder, garlic powder, salt/pepper, and any other ingredients you choose to add.
  7. Serve on wheat bread or King's Hawaiian Buns
Adapted from Damn Delicious
The Pinterest Wife https://www.thepinterestwife.com/


IMG_4444Hi there! So a few weeks ago, my church choir had our last rehearsal before we taking a summer break. Throughout the year, we take turns bringing in treats to share with the choir after rehearsal, and people apparently love the random things I bring in. Well, I committed to bringing treats for the last rehearsal months prior to the actual date, and wouldn’t you know, I ended up having to work a little late that day and forgot to make something the night before. I left work at 5 and had to leave my house for rehearsal by 6:15. Rock—-me—-hard place…Eek. Well, I perused my boards for something quick and found this gem I had pinned a while ago from Living a Changed Life that looked easy enough. I should also add that I needed to stop at the grocery store on my way home because I clearly wasn’t responsible enough to get the ingredients ahead of time….procrastination at its finest… Anyways, this berry cobbler took only 4 ingredients. Yes, 4! I got home at 5:15 and was out the door by 6:20 (extra 5 minutes came from trying to figure out what to transport the hot pans in). The members of my choir DEVOURED it and were all asking for seconds! The best part about this cobbler (besides the fact that it’s easy enough for a monkey to make) is that you CAN have seconds and not regret it because it’s a skinny, weight watchers recipe! This recipe is perfect to throw together before a party or barbecue ESPECIALLY in the summer (think: 4th of July red, white, and blue parties) and will leave your house smelling amazing (so much so that Eric was kind of mad there were no leftovers because he had to smell it baking but didn’t get to try it). Anyways, try his easy, skinny, berry cobbler out at your next summer cookout and let me know how it went!

Ingredients:

  • 24 oz frozen mixed berries/fruit of your choice (most likely will be 2 12 oz bags)
  • 1 box white cake mix
  • 1-1 1/2 can of Sprite zero
  • Non-stick Spray
  1. Preheat oven to 350
  2. Spray a 9×13 pan with non stick cooking spray (I doubled the recipe and used 2 square pans)IMG_4439
  3. Spread frozen fruit out along the bottom of your panIMG_4440
  4. Spread dry cake mix so it completely covers the fruitIMG_4441
  5. SLOWLY pour the sprite over the cake mix until there are no dry spots. *NOTE: it may take a little more than 1 can to do this depending on how large of a pan you choose to use*IMG_4442
  6. Do NOT mix the sprite with the cake mix!  The foam you see on top will create a “crust” when bakedIMG_4443
  7. Bake at 350 for 45-50 minutes
  8. Serve with Vanilla Ice Cream
Quick & Easy Berry Cobler
A quick and easy, 4 ingredient berry cobbler that won't hurt the waistline!
Write a review
Print
Prep Time
3 min
Cook Time
45 min
Total Time
48 min
Prep Time
3 min
Cook Time
45 min
Total Time
48 min
Ingredients
  1. 24 oz frozen mixed berries/fruit of your choice (most likely will be 2 12 oz bags)
  2. 1 box white cake mix
  3. 1-1 1/2 can of Sprite zero
  4. Non-stick Spray
Instructions
  1. Preheat oven to 350
  2. Spray a 9x13 pan with Pam for baking (or whatever non stick spray you like)
  3. Spread frozen fruit out along the bottom of your pan
  4. Spread dry cake mix so it completely covers the fruit
  5. SLOWLY pour the sprite over the cake mix until there are no dry spots. *NOTE: it may take a little more than 1 can to do this depending on how large of a pan you choose to use*
  6. Do NOT mix the sprite with the cake mix! The foam you see on top will create a "crust" when baked
  7. Bake at 350 for 45-50 minutes
  8. Serve with Vanilla Ice Cream
Adapted from Living A Changed Life
The Pinterest Wife https://www.thepinterestwife.com/