DSC00399

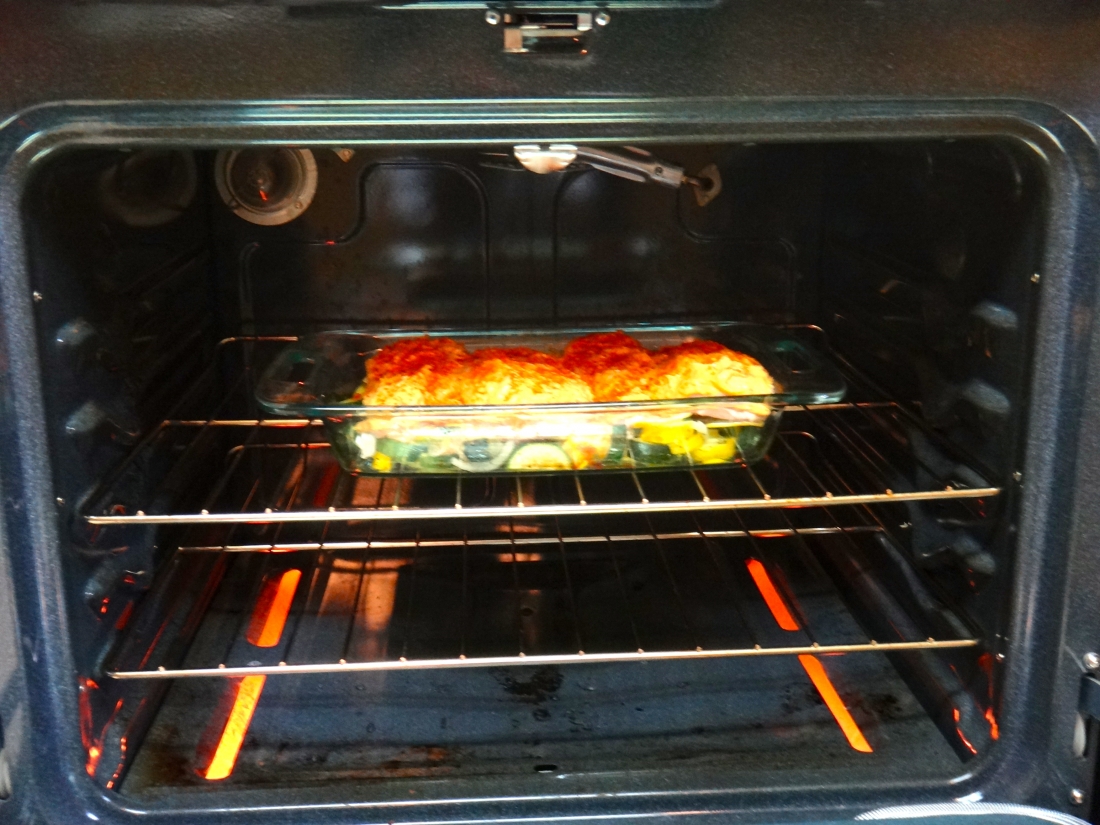
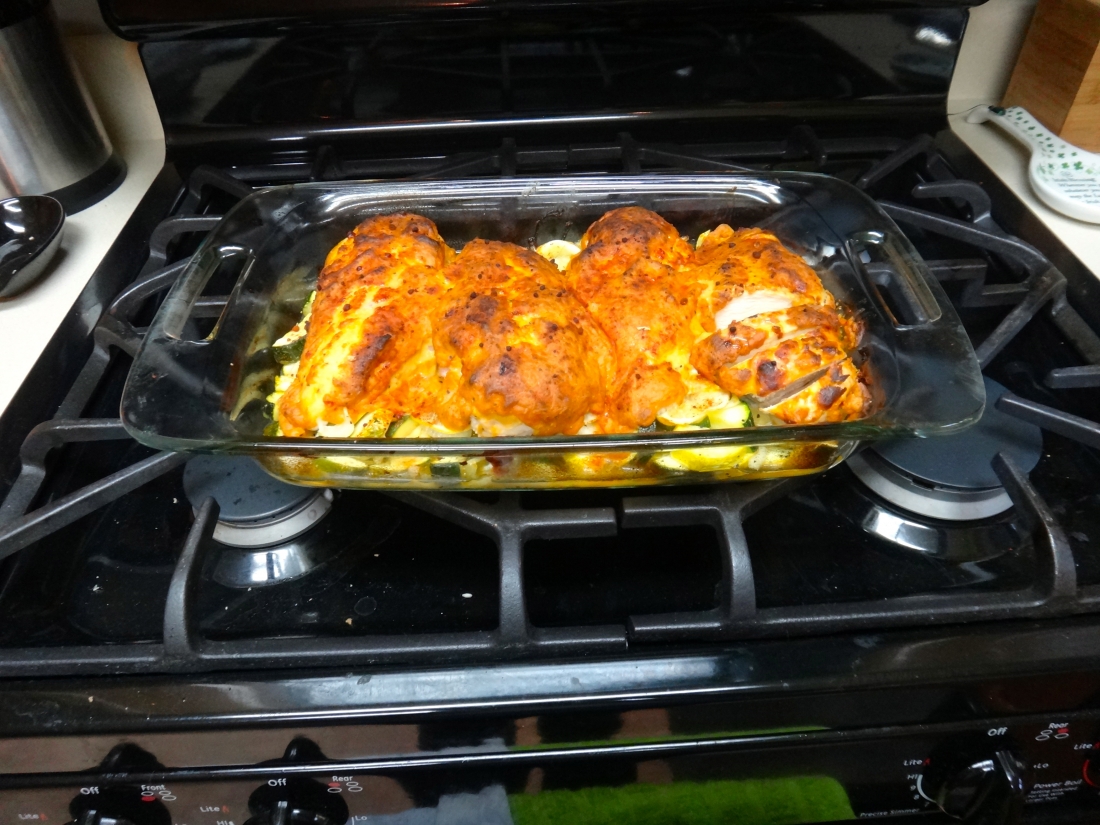
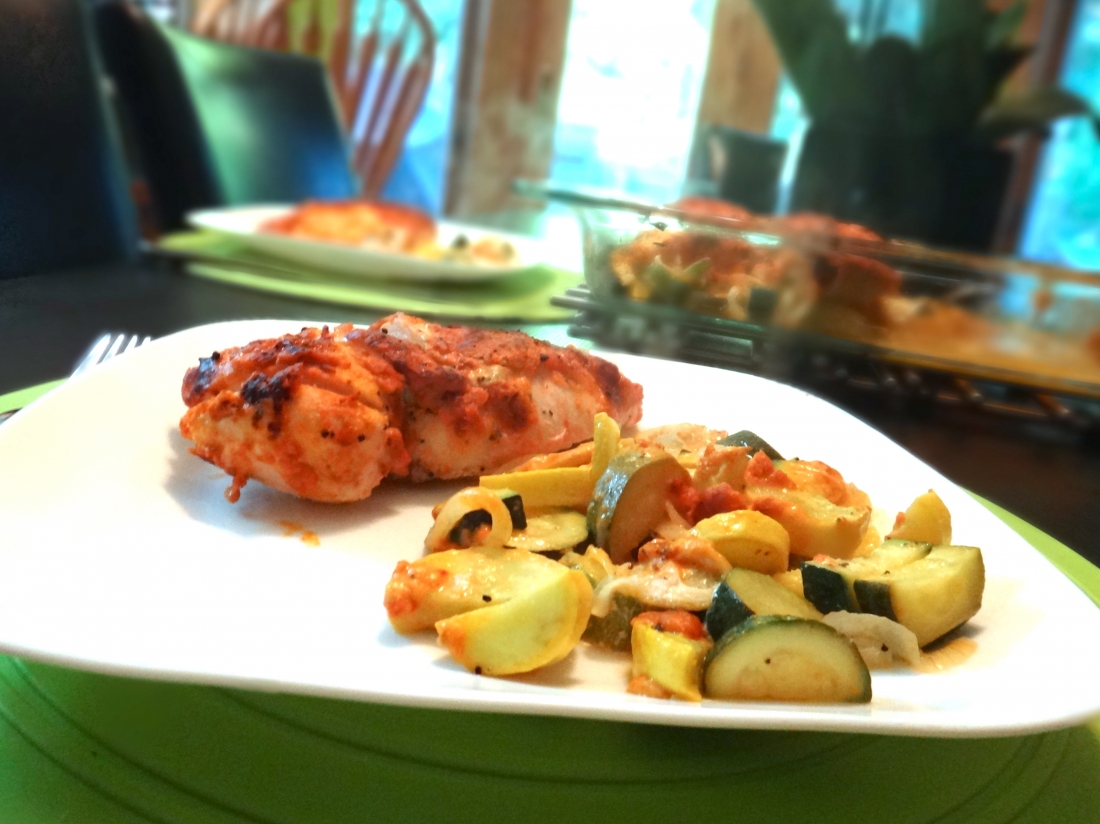
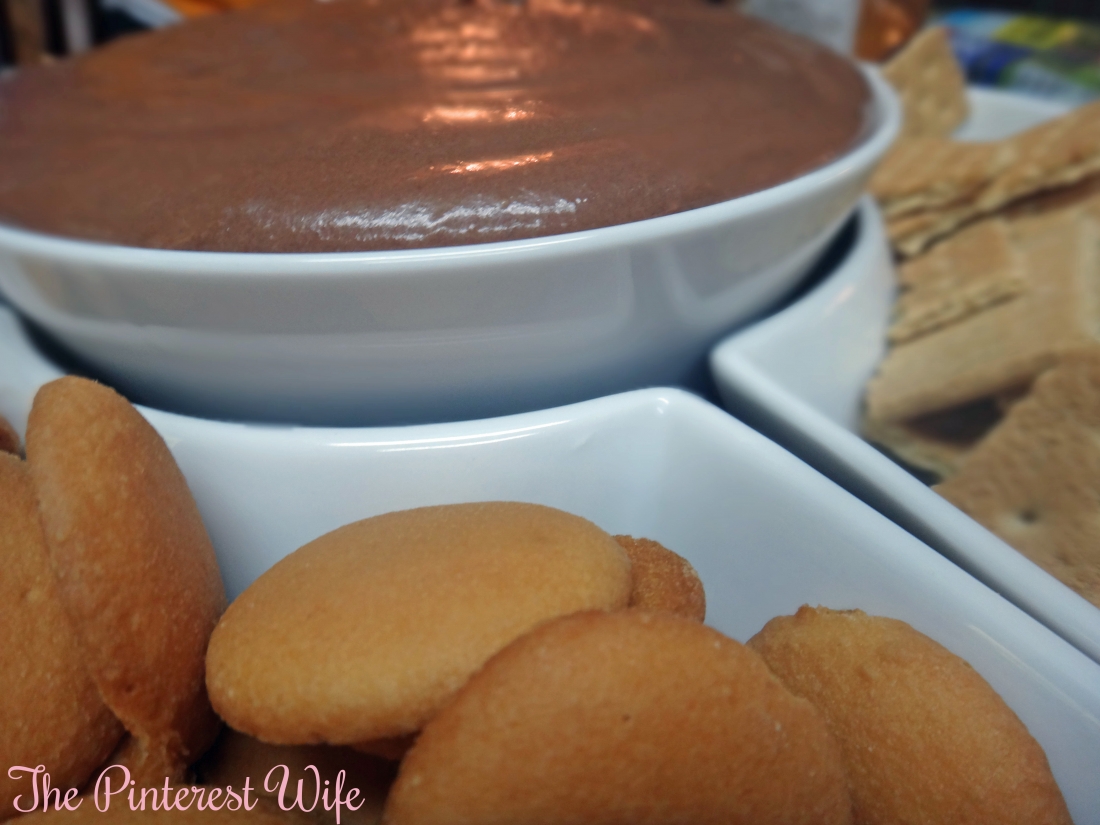
Hey everyone, hope you had a good Sunday-funday.  We spent our day with our best friends tailgating, watching our beloved Vikes play horribly, and watching more football.  I’ve got another tailgate/hosting friendly recipe for you all and it’s AHHHHmazing.  Brownie batter dip aka heaven.  Due to the copious amounts of adult beverages that tend to be consumed while tailgating, I lightened up the recipe a bit…because lets be honest, the last thing you want is to add unnecessary calories, AND this way you can eat more of it without feeling as guilty.  This dip is incredibly quick to throw together and will satisfy all you chocoholics out there.

Ingredients

  • 8 ounces fat free cream cheese, softened to room temperature
  • 1/4 cup (4 tablespoons) margarine, softened to room temperature
  • 2 cups powdered sugar, (may need more for a stiffer consistency)
  • 5 tablespoons all-purpose flour
  • 5 tablespoons cocoa powder, regular or Dutch-process
  • 2 tablespoons brown sugar
  • 2 teaspoon vanilla
  • 3 tablespoons skim milk
  • Chocolate chips for garnish (optional)
  • Pretzels, strawberries, graham crackers, animal crackers, apples for dipping
  1. Whip cream cheese and margarine until light and fluffy (1-2 minutest) using either a stand mixer or a large bowl and hand mixer
  2. Add 2 cups of the powdered sugar and mix well
  3. Add the flour, cocoa powder, brown sugar, vanilla and 2 tablespoons milk.
  4. Mix until fluffy and smooth.

*Your dip should be soft enough that your dippers don’t break but not too soft that it looses its shape and fluffy texture*

Brownie Batter Dip
Write a review
Print
Cook Time
10 min
Cook Time
10 min
Ingredients
  1. 8 ounces fat free cream cheese, softened to room temperature
  2. 1/4 cup (4 tablespoons) margarine, softened to room temperature
  3. 2 cups powdered sugar, (may need more for a stiffer consistency)
  4. 5 tablespoons all-purpose flour
  5. 5 tablespoons cocoa powder, regular or Dutch-process
  6. 2 tablespoons brown sugar
  7. 2 teaspoon vanilla
  8. 3 tablespoons skim milk
  9. Chocolate chips for garnish (optional)
  10. Pretzels, strawberries, graham crackers, animal crackers, apples for dipping
Instructions
  1. Whip cream cheese and margarine until light and fluffy (1-2 minutest) using either a stand mixer or a large bowl and hand mixer
  2. Add 2 cups of the powdered sugar and mix well
  3. Add the flour, cocoa powder, brown sugar, vanilla and 2 tablespoons milk.
  4. Mix until fluffy and smooth.
Notes
  1. Your dip should be soft enough that your dippers don't break but not too soft that it looses its shape and fluffy texture
  2. Serve with pretzels, nilla wafers, graham crackers, fruit, animal crackers
Adapted from Mel's Kitchen Cafe
The Pinterest Wife https://www.thepinterestwife.com/
Now, time to watch some Revenge with my best friend to round off my perfect weekend (PS if you don’t watch it, you NEED to start…it’s probably the best show right now) Have a good week!

DSC00400

Hey guys!  Sorry I disappeared for a week there…I was in Canada visiting with my family and attending my cousins wedding (which was beautiful, congratulations to Fallon & Wesley D’Souza!) Any ways… the best time of year is among us–football season.  We all know what that means…tailgating and watching games.  Since Eric got a new 60″ for his birthday, we’ve been having our friends over for the games (aka I get to make appetizers and snacky things for everyone to try out.)  I’m a lover of all things pizza so for the last football game I tried out these mini pepperoni pizza bites.  They were very easy to make and were gobbled up in no time at all.  *Note: I did NOT change anything from the recipe–weird, I know– but next time I would try it with skim milk and turkey pepperoni to lighten it up a bit*

Prep Time: 12 minutes

Cook Time: 20 minutes

Ingredients

  • Nonstick baking spray
  • 3/4 cup flour
  • 3/4 teaspoon baking powder
  • 1 tablespoon Italian seasoning
  • pinch of salt (optional)
  • pinch of red pepper flakes (optional)
  • 3/4 cup whole milk
  • 1 egg, lightly beaten
  • 1 cup shredded mozzarella cheese
  • 1/4 cup grated Parmesan cheese
  • 1 cup cubed pepperoni
  • 1/2 cup store-bought pizza sauce
  1. Preheat oven to 375°
  2. Spray a 24 cup mini muffin pan with Nonstick baking spray
  3. In a large bowl, whisk together flour, baking powder, Italian seasoning, salt, & red pepper flakes (if using)
  4. Whisk in milk and eggs
  5. Stir in Mozaarella cheese, Parmesan cheese, and pepperoni
  6. Let stand for 10 minutesDSC00397
  7. Stir and spoon into your muffin tins (they will puff up so if you want them flat across, fill 3/4 full and if you want them puffed like a muffin fill almost to the top)DSC00398
  8. Bake until golden brown and puffed up
  9. Microwave the pizza sauce until warmed through
  10. Serve the puffs with the pizza sauce for dipping

Pepperoni Pizza Bites
Yields 24
An easy appetizer great for tailgating
Write a review
Print
Prep Time
12 min
Cook Time
20 min
Total Time
22 min
Prep Time
12 min
Cook Time
20 min
Total Time
22 min
Ingredients
  1. Nonstick baking spray
  2. 3/4 cup flour
  3. 3/4 teaspoon baking powder
  4. 1 tablespoon Italian seasoning
  5. pinch of salt (optional)
  6. pinch of red pepper flakes (optional)
  7. 3/4 cup whole milk
  8. 1 egg, lightly beaten
  9. 1 cup shredded mozzarella cheese
  10. 1/4 cup grated Parmesan cheese
  11. 1 cup cubed pepperoni
  12. 1/2 cup store-bought pizza sauce
Instructions
  1. Preheat oven to 375°
  2. Spray a 24 cup mini muffin pan with Nonstick baking spray
  3. In a large bowl, whisk together flour, baking powder, Italian seasoning, salt, & red pepper flakes (if using)
  4. Whisk in milk and eggs
  5. Stir in Mozaarella cheese, Parmesan cheese, and pepperoni
  6. Let stand for 10 minutes
  7. Stir and spoon into your muffin tins (they will puff up so if you want them flat across, fill 3/4 full and if you want them puffed like a muffin fill almost to the top)
  8. Bake until golden brown and puffed up
  9. Microwave the pizza sauce until warmed through
  10. Serve the puffs with the pizza sauce for dipping
Adapted from Lick The Bowl Good
The Pinterest Wife https://www.thepinterestwife.com/
PS: here’s a little Princess for you guys…she’s a football fan too 😉20131007-092650.jpg


DSC003951

Ok, so I’m going to preface this with this post by saying this Low Carb Baked Coconut Shrimp may be the best thing I have EVER made in my life.  Eric agrees, this is by far his favorite dish I have ever made (he ate leftovers for breakfast because he couldn’t wait until lunch to eat them.)  I brought them in to eat for lunch and I knew my coworker, Tasha, liked coconut shrimp, but I didn’t know how much.  She told me she would possibly walk away from her 8 year relationship just to have an endless supply of it.  After she told me about her profound love of coconut shrimp, I almost didn’t want to let her try it just in case it didn’t live up to her high standards, but she totally fell in love and said she was a little mad that I only left one for her to try.  The best part about these crunchy, delicious shrimps is that it’s low carb!  Does it get better than this? I think not.  

I found a copy cat recipe for the Red Lobster Pina Colada sauce, which both Eric and Tasha said tasted identical.  However, it is not low carb, low fat, or low anything, but it is HIGHLY amazing (It’s a sauce though, so just curb how much you use if you’re concerned ;).)  Anyways, hope you guys enjoy these amazing baked coconut shrimp!

Prep Time: 15 minutes

Cook Time: 15 minutes

Ingredients

  • 18 raw Jumbo Shrimp
  • 1/3 cup cornstarch
  • 3/4 tsp. salt
  • 1/2 tsp. Cayenne Pepper
  • 3 eggs
  • 2 cups Sweet Coconut Flakes
  • Nonstick cooking sprayDSC003731
  1. Preheat your oven to 450°
  2. Place a wire cooling rack on top of your baking sheet and spray with nonstick cooking sprayDSC003751
  3. Peel and vein shrimp, leaving the tail intact (if not already done)
  4. Starting at the tail, make a slit down the inner curve of the shrimpDSC003811
  5. Press lightly to flattenDSC003831
  6. Combine cornstarch, salt, and cayenne Pepper in a shallow dishDSC003771
  7. Add eggs to another dish and whip until combinedDSC003781
  8. Put coconut flakes into another shallow dishDSC003791
  9. Coat shrimp with cornstarch, salt, cayenne pepper mixtureDSC003851
  10. Dip into the eggsDSC003861
  11. Coat with coconut flakes (make sure you get them covered well)DSC003871
  12. Place on prepared wire cooling rackDSC003881
  13. Bake for 15 minutes or until cooked throughDSC003891


Pina Colada Dipping Sauce

This is a copy cat of the dipping sauce they serve at Red Lobster with their Parrot Bay Coconut Shrimp

  • 1 cup piña colada mix
  • 5 tablespoons water
  • 2 tablespoons drained crushed pineapple
  • 4 teaspoons sweetened flaked coconut
  • 3 tablespoons + 1 teaspoon confectioners’ sugar
  • 1 1/2 teaspoons cornstarchDSC003911
  1. Mix together pina colada mix, water, crushed pineapple, coconut, and powdered sugar in a sauce pan.
  2. Heat on medium temperature until sauce begins to simmer, stirring frequently.
  3. Let mixture simmer slowly 10 minutes.
  4. Mix cornstarch and cold water together
  5. add to sauce and blend well
  6. Let mixture simmer for 3-5 minutes longer while stirring during and after adding cornstarch.
  7. Remove from heat and bring to room temperature.(If you’re in a hurry, you can add 1 ice cube to cool it quickly)
  8. Sauce is served at room temperature with Coconut Shrimp

Low Carb Baked Coconut Shrimp
Crunchy, delicious, and low carb take on a classic shrimp favorite
Write a review
Print
Prep Time
15 min
Cook Time
15 min
Total Time
30 min
Prep Time
15 min
Cook Time
15 min
Total Time
30 min
Ingredients
  1. 18 raw Jumbo Shrimp
  2. 1/3 cup cornstarch
  3. 3/4 tsp. salt
  4. 1/2 tsp. Cayenne Pepper
  5. 3 eggs
  6. 2 cups Sweet Coconut Flakes
  7. Nonstick cooking spray
Instructions
  1. Preheat your oven to 450°
  2. Place a wire cooling rack on top of your baking sheet and spray with nonstick cooking spray
  3. Peel and vein shrimp, leaving the tail intact (if not already done)
  4. Starting at the tail, make a slit down the inner curve of the shrimp
  5. Press lightly to flatten
  6. Combine cornstarch, salt, and cayenne Pepper in a shallow dish
  7. Add eggs to another dish and whip until combined
  8. Put coconut flakes into another shallow dish
  9. Coat shrimp with cornstarch, salt, cayenne pepper mixture
  10. Dip into the eggs
  11. Coat with coconut flakes (make sure you get them covered well)
  12. Place on prepared wire cooling rack
  13. Bake for 15 minutes or until cooked through
Notes
  1. Serve with Pina Colada Sauce
Adapted from Lady Behind The Curtain
The Pinterest Wife https://www.thepinterestwife.com/
Pina Colada Sauce
A delicious sauce for coconut shrimp similar to the one they serve at Red Lobster.
Write a review
Print
Total Time
15 min
Total Time
15 min
Ingredients
  1. 1 cup piña colada mix
  2. 5 tablespoons water
  3. 2 tablespoons drained crushed pineapple
  4. 4 teaspoons sweetened flaked coconut
  5. 3 tablespoons + 1 teaspoon confectioners’ sugar
  6. 1 1/2 teaspoons cornstarch
Instructions
  1. Mix together pina colada mix, water, crushed pineapple, coconut, and powdered sugar in a sauce pan.
  2. Heat on medium temperature until sauce begins to simmer, stirring frequently.
  3. Let mixture simmer slowly 10 minutes.
  4. Mix cornstarch and cold water together
  5. add to sauce and blend well
  6. Let mixture simmer for 3-5 minutes longer while stirring during and after adding cornstarch.
  7. Remove from heat and bring to room temperature.
  8. Sauce is served at room temperature with Coconut Shrimp
Notes
  1. If you're in a hurry, you can add 1 ice cube to cool the sauce quickly.
Adapted from Copy Kat
The Pinterest Wife https://www.thepinterestwife.com/

DSC00371

So Eric and I have been wanting to do lettuce wraps for dinner for a while now and I am huge fan of the Thai beef lettuce wraps at Big Bowl.  I did a search on Pinterest for a Thai lettuce wrap and it provided me with a bunch!  Since we’ve been trying to eat less red meat, I substituted the sirloin, called for in the recipe for ground turkey.  I also changed a few of the ingredients to make it a little healthier.  You could certainly use whatever meat you wanted and it would still taste great (ground beef, sirloin, chicken, etc.)

PS: While the meat is marinating, make the Thai sweet chili garlic sauce.  I changed a few things from this recipe to make it healthier as well and it was soooo good!  Since it keeps in the fridge well, this will definitely be making another appearance in the Dahlin household.

Prep Time: 30 minutes

Cook Time: 5-10 minutes

Ingredients:

  • 1 lb Ground Turkey
  • 1/4 Cup 1/3 less sodium Soy Sauce
  • 1/4 Cup Rice Wine Vinegar
  • 3 tsp. Minced Garlic
  • 1 tsp. Sesame Oil
  • 1 tsp. Ginger powder
  • 2 tsp. Sambal Oelek (Chili Garlic Sauce)
  • 1 Tbsp. Olive Oil
  • 1 head of lettuceDSC00358


  1. Marinate the ground turkey in soy sauce, rice wine vinegar, garlic, sesame oil, ginger powder, and Sambal Oelek for 30 minutesDSC00359
  2. Head olive oil in skilletDSC00360
  3. Saute ground turkey until cooked through (5-10 minutes)
  4. Peel leaves off your head of lettuce (this can be tricky to do without ripping the lettuce)
  5. Spoon the ground turkey into the lettuce wrap shell and top with the Thai sweet chili sauce.


Thai Sweet Chili Garlic Sauce

DSC00369

Cook Time: 10 minutes

Ingredients:

  • 1 Cup Splenda
  • 1/2 Cup white vinegar
  • 1/2 Cup water
  • 1 Tbsp. minced garlic
  • 1 tsp. salt
  • 1 Tbsp. Sriracha sauce (Chili Garlic Sauce)

DSC00365

  1. In a medium saucepan, bring Splenda, white vinegar, water, garlic, and salt to a gentle boil over medium heat.
  2. Boil until the mixture is a thin syrup (about 10 minutes)
  3. Remove from heat and stir in Sriracha sauce.

It should keep in your refrigerator for about a week.

Enjoy!!

Thai Turkey Lettuce Wrap
Serves 4
A healthy spin on an easy Asian meal
Write a review
Print
Prep Time
30 min
Total Time
40 min
Prep Time
30 min
Total Time
40 min
Ingredients
  1. 1 lb Ground Turkey
  2. 1/4 Cup 1/3 less sodium Soy Sauce
  3. 1/4 Cup Rice Wine Vinegar
  4. 3 tsp. Minced Garlic
  5. 1 tsp. Sesame Oil
  6. 1 tsp. Ginger powder
  7. 2 tsp. Sambal Oelek (Chili Garlic Sauce)
  8. 1 Tbsp. Olive Oil
  9. 1 head of lettuce
Instructions
  1. Marinate the ground turkey in soy sauce, rice wine vinegar, garlic, sesame oil, ginger powder, and Sambal Oelek for 30 minutes
  2. Head olive oil in skillet
  3. Saute ground turkey until cooked through (5-10 minutes)
  4. Peel leaves off your head of lettuce (this can be tricky to do without ripping the lettuce)
  5. Spoon the ground turkey into the lettuce wrap shell and top with the Thai sweet chili sauce.
Adapted from A Girl, A Market, A Meal
The Pinterest Wife https://www.thepinterestwife.com/
Thai Sweet Chili Garlic Sauce
A slightly healthier sweet and spicy sauce to add to your favorite Asian dishes
Write a review
Print
Total Time
10 min
Total Time
10 min
Ingredients
  1. 1 Cup Splenda
  2. 1/2 Cup white vinegar
  3. 1/2 Cup water
  4. 1 Tbsp. minced garlic
  5. 1 tsp. salt
  6. 1 Tbsp. Sriracha sauce (Chili Garlic Sauce)
Instructions
  1. In a medium saucepan, bring Splenda, white vinegar, water, garlic, and salt to a gentle boil over medium heat.
  2. Boil until the mixture is a thin syrup (about 10 minutes)
  3. Remove from heat and stir in Sriracha sauce.
Notes
  1. It should keep in your refrigerator for about a week.
Adapted from A Girl, A Market, A Meal
The Pinterest Wife https://www.thepinterestwife.com/


DSC00356

So green beans are most definitely one of my favorite vegetables. Hands down.  I’m also a huge lover of cheese….every kind, on anything and everything, I love it all.  I typically just saute my green beans with garlic and olive oil, but when I stumbled upon this gem of a recipe, I knew I had to give it a try.  It’s super simple, requires few ingredients, and makes for a quick side.

**Note: I’m one of those people who likes things crispy, so you’ll notice mine are a little on the done side.  But don’t fret pretties, the time listed on the recipe below is for them to come out “normal”**


Prep Time: 5 minutes

Cook Time: 15 minutes

Ingredients:

  • 12 oz Green Beans (washed, trimmed, and dried)
  • 1 Tbsp. Olive Oil
  • Salt & Pepper to taste
  • 1 tsp. Garlic Powder
  • 2 Tbsp. Shredded Parmesan Cheese
  1. Preheat oven to 425°FDSC00337
  2. Line a baking sheet with aluminum foil (makes for an easy cleanup if any cheese melts to it)
  3. Lay green beans out on the baking sheet
  4. Drizzle olive oil over beans and season with sale, pepper, and garlic powder.
  5. Toss to coat them all evenly.
  6. Spread them so they lay flat on your baking sheetDSC00340
  7. Bake for 10 minutes
  8. Shake the pan so they flip and bake for another 5 minutes
  9. OPTIONAL: If you want them more done, put your oven off and leave the beans in for an additional 2-3 minutes or until desired crispiness is reached.
  10. Remove from the oven and gather the beans together on the pan so they are touching but still laying relatively flat (i.e. you want the cheese to melt to the beans, NOT the pan.)
  11. Sprinkle Parmesan Cheese over the beansDSC00348
  12. Allow the cheese to melt over the beans for a few minutes before serving

And there you have it, an incredibly easy, cheesy, tasty side dish.

**You may notice that I neglected to do step 10 (which is why I added it in here) and found that the cheese mostly melted to the pan and I had to add cheese on top of the beans again when I put it on the serving dish.  Learn from my mistake…try to eliminate any space on the pan that could serve as an escape route for your cheese**

PS: since this recipe is so easy, you could add some variety to meet your tastes or better accompany your main dish.

Here are some options if you’re feeling adventurous or just need a change:

  • add red pepper flakes for a little kick
  • Italian seasonings (ex. oregano, basil, parsley, marjoram, rosemary, sage, thyme)
  • Honestly, any seasoning that you use with your main dish can be added to this side and is a nice way to tie your side in with your main course
  • Try using a different vegetable (I would try asparagus, squash, or zucchini–you shouldn’t have to adjust your cook times too much with these)
  • Experiment with different cheeses (I would recommend Asiago or Mozarella as those tend to be really good melted, but you can try whatever your heart desires)

I would love to hear what varieties you put on this side dish and if you have any other suggestions for ways to change it up!Enjoy!


Roasted Parmesean Green Beans
Serves 4
A simple, tasty spin on green beans
Write a review
Print
Prep Time
5 min
Cook Time
15 min
Total Time
20 min
Prep Time
5 min
Cook Time
15 min
Total Time
20 min
Ingredients
  1. 12 oz Green Beans (washed, trimmed, and dried)
  2. 1 Tbsp. Olive Oil
  3. Salt & Pepper to taste
  4. 1 tsp. Garlic Powder
  5. 2 Tbsp. Shredded Parmesan Cheese
Instructions
  1. Preheat oven to 425°F
  2. Line a baking sheet with aluminum foil (makes for an easy cleanup if any cheese melts to it)
  3. Lay green beans out on the baking sheet
  4. Drizzle olive oil over beans and season with sale, pepper, and garlic powder.
  5. Toss to coat them all evenly.
  6. Spread them so they lay flat on your baking sheet
  7. Bake for 10 minutes
  8. Shake the pan so they flip and bake for another 5 minutes
  9. OPTIONAL: If you want them more done, put your oven off and leave the beans in for an additional 2-3 minutes or until desired crispiness is reached.
  10. Remove from the oven and gather the beans together on the pan so they are touching but still laying relatively flat (i.e. you want the cheese to melt to the beans, NOT the pan.)
  11. Sprinkle Parmesan Cheese over the beans
Notes
  1. PS: since this recipe is so easy, you could add some variety to meet your tastes or better accompany your main dish.
Here are some options if you're feeling adventurous or just need a change
  1. add red pepper flakes for a little kick
  2. Italian seasonings (ex. oregano, basil, parsley, marjoram, rosemary, sage, thyme)
  3. Honestly, any seasoning that you use with your main dish can be added to this side and is a nice way to tie your side in with your main course
  4. Try using a different vegetable (I would try asparagus, squash, or zucchini--you shouldn't have to adjust your cook times too much with these)
  5. Experiment with different cheeses (I would recommend Asiago or Mozarella as those tend to be really good melted, but you can try whatever your heart desires)
Adapted from Skinny Taste
The Pinterest Wife https://www.thepinterestwife.com/


DSC00354

Ok, so this recipe is, hands down, one of mine and Eric’s favorite recipes found on pinterest (my coworker, Tasha also loves this recipe–I brought in leftovers after I made it the first time and she fell in love with it and has since made it a few times as well.)  Now, I’m not usually someone who likes to have sweet and spicy (or any other flavor really) mixed with each other, but this chicken is AHHHH-mazing.  It definitely has a kick to it but the sweetness in the honey balances it out really well.  If you’re looking for an easy weeknight meal that takes very little prep time, this is for you!  Since you’re making a rub for the chicken you don’t have to wait to for it to marinate.

**I will apologize in advanced: I don’t have a picture for EVERY step…my hands were kinda icky and I forgot to get a picture in between some of the steps.**


Prep Time: 5 minutes

Cook Time 10 minutes

Ingredients

  • 4 Boneless Chicken Breasts
  • 2 Tbsp. Olive Oil
  • 1 Tbsp.  Garlic Powder
  • 1 Tbsp. Chili Powder
  • 1 tsp. Onion Powder
  • 1 tsp. Salt
  • 1 tsp. Cumin
  • 1 tsp. Chipotle Chili Powder (I used Hot Mexican Chili Powder)
  • 1 tsp. Cayenne Pepper (optional if you want it spicier)
  • 1/2 Cup Honey
  • 1 Tbsp. Cider VinegarDSC00324
  1. Combine the spices for your rub (garlic powder, chili powder, onion powder, salt, cumin, chipotle chili powder, and optional cayenne pepper) and mix well.DSC00330
  2. Drizzle Olive Oil over chicken and rub it in so it is completely coated
  3. Toss the chicken in your rub (be sure to really rub it in with your hands so it gets in there well)
  4. Put your chicken on the grill for 3-5 min per side or until cooked through (if you don’t have access to a grill, you can do it on the stove, I’ve done both ways, but since it’s still nice out we opted for the grill this time.)DSC00341
  5. While the chicken is cooking, prepare your glaze by microwaving the honey for about a minute or until it is a thinner consistencyDSC00347
  6. Add the vinegar and stir wellDSC00349
  7. Separate 2 Tbsp. of your honey glaze for later (trust me, DO NOT skip this step!DSC00352
  8. In the final moments of grilling, brush the honey glaze on your chicken. **Disclaimer: This will get very smokey and leave your grill/pan a hot, sticky mess.  If you are making this on a pan inside, I would HIGHLY recommend having the fan on or opening a window to avoid setting off smoke alarms.**DSC00353
  9. Remember that glaze you set aside earlier?  You’re gonna wanna drizzle it over the chicken right before you serve it…trust me.DSC00354

Like i said, this can get really sticky and be hard to clean up after.  If you just leave your grill on for a few minutes after you take the chicken off, the sugar will continue to burn and be easy to scrape off before you put your grill off.

Like I said, this is one of our favorites–not only because it tastes amazing, but also because it is SO quick and easy to make.

Enjoy!


Hey pretties!  Ever since my mom’s Mediterranean themed surprise going away party, Eric and I have been on a huge Hummus kick.  When I saw this recipe on pinterest, I thought we should give it a try!

Ingredients

  • 4 boneless, skinless chicken breasts
  • Salt and Pepper
  • 2 Zucchinis sliced and halved
  • 2 Yellow Squash sliced and halved
  • 1 Medium Onion sliced
  • 1 cup Red Pepper Hummus (or any other hummus you like)
  • 2 Tbsp. Olive Oil
  • 2 Lemons (one thinly sliced, the other to squeeze)
  • 2 tsp Paprika
  1. Preheat your oven to 450DSC00308
  2. Season your Chicken Breasts with salt and pepperDSC00298
  3. In a large bowl, toss your squash, zucchini, and onion with olive oil until it is all coatedDSC00292
  4. Spread your vegetables on the bottom of your baking dish and sprinkle salt and pepper over itDSC00295
  5. Place your thinly sliced lemons on top of the vegetablesDSC00297
  6. Lay the four chicken breasts on top of the lemons and vegetablesDSC00300
  7. Spread your hummus over all of the chicken breasts, ensuring you get the sides as wellDSC00301
  8. Squeeze the juice from your second lemon over the chicken then cover with PaprikaDSC00310
  9. Put it in the oven for 25-30 minutes (Our chicken breasts were gigantor so they took about 35 min)DSC00311
  10. Make sure your chicken is cooked thoroughly and your vegetables are tender.DSC00313
  11. Serve immediately and enjoy!DSC00317

Easy peasy weeknight meal!

Have any of your ever tried this or a variation of it? How did it go?  I’d love to hear from you!


Well hello, pretties! Thank you for stopping by my blog. I’m so excited to start this adventure, and am so glad you’re taking it with me! I thought I’d start by telling you a little about The Pinterest Wife, why I started it, and what you will find here. I got married a year ago today to my high school sweetheart and was thrust into a world completely unknown to me. Growing up, I was a 3 sport athlete and my mom traveled and worked a lot. We were fortunate to have my grandparents come live with us for a few years in which they took care of all of cooking. Due to the busy schedules of my mom and I, we also had someone who cleaned our house and took care of all of the yard work. I went straight from my home life, where I rarely had to cook, clean, or garden, to college where I lived in my sorority house that also had someone to cook and clean for us. With that being said, did I ever cook and clean? Of course, (I did live in an apartment the last year of college and had to keep that clean and occasionally cooked when I didn’t go to my sorority for meals and my mom did make me do it when we had time.) The point is, I never really learned all the little tricks one would acquire from doing it frequently their whole lives. When Eric and I bought our first house in December, we decided I would take care of all the cooking and most of the cleaning, and Eric would do everything outside, laundry, and dishes. While I dabbled in cooking (mostly baking) during my senior year of college while living in my apartment, I always knew I could eat out or at my sorority house if I didn’t want to cook. Being a homeowner and having a normal, 8-5, schedule, forced me to learn how to be domestic. How did I do this you may ask? Pinterest, aka my lifesaver. For those of you who don’t know what Pinterest is (first of all, welcome to the 21st century) it’s a website that allows you to organize and keep the things you love in one place. They have different categories from food & drinks, to art, to fashion, to hair & beauty–literally something for everyone (I planned the majority of my wedding using pinterest.) Pinterest allows you to organize these things into boards, and displays a picture and brief description that you can always view online which links you back to the original page. Mind. Blown. Anyways… I get 99% of my recipes from pinterest and have also learned A LOT about cleaning (who knew I could clean a house right?!) I’ve always had an extreme love for crafting and pretty much everything DIY. Almost all of my craft ideas that I do myself and with my residents at work come from pinterest.

Over the last year, whenever I put pictures of things I had made (both food & crafts) I always had people asking how I came up with it/ if they can have the recipe (and tell me I’m a mini Martha Stewart…best. compliment. ever.) I figured why not blog about all of it and provide instructions? “Well, why don’t you just tell people to go look at the original site?” Something you should know about me is I am reallllllly bad at following directions (intentionally) and I like to change things to make them my own and to cater to our tastes and make things healthier. Blogging about it and giving you all my way of doing it will provide you with more options and it’s easier than directing people to a bajillion different sites.

Anyways, the moral of the story is I created this blog so I can share my journey from being a girl who was always dependent on others for domestic duties to an independent wife who can take care of her home and family while working full time and still having time for shopping, friends, and wine. Thank you for joining me on this journey, I’m so excited to share it with all of you!